|
|
Post by engineerone on Dec 9, 2007 22:54:52 GMT
so there i am having started my latest project, a table, and it has tapers on two sides of the legs. last time they were short tapers, so relatively easy. this time they are about 450mm long, tapering about 3mm so i have marked the line, but it is still quite difficult so anyone got an easier way to work it out and make it work??? paul  |
|
|
|
Post by jamesarthur on Dec 10, 2007 3:10:05 GMT
Harry Strasil had a jig for that on a post in Sawmill Creek. I believe he simply fastened a batten onto a piece of plywood that corresponded to the appropriate angle and then, after attaching the stuff to the plywood against the batten, (part of it overhung the edge) planed the leg or whatever it was he was doing, until it lined up with the edge of the plywood.
I think that was how it worked, looked dead simple though.
|
|
jmk89
New Member

Posts: 37
|
Post by jmk89 on Dec 10, 2007 4:11:39 GMT
What I have done in the past is to cut a taper piece on the table saw which I tape (using double sided tape) to the piece about 10mm from one edge. Then having set the depth gauge of a rebate plane (eg Stanley #78) to the amount of taper, I plane a rebate down that edge - it will of course taper at the same rate as the tapered strip. Then move the strip to 10mm from the other edge of the same face and rebate the same way . You are then left with a raised strip in the middle that is easy to take off with a Jack and then you can smooth it.
The only problem is that you have to plane one edge against the grain - that is why I use a #289 for this trick!
|
|
|
|
Post by Alf on Dec 10, 2007 9:58:56 GMT
that is why I use a #289 for this trick! Oh, well played.  Make it easier? Hmm, s'not that hard, is it? Or we looking for an engineering solution to a skill problem again...?  Suppose you could prop it up so the desired taper becomes the horizontal which'd make it a bit more intuative. Cheers, Alf |
|
|
|
Post by engineerone on Dec 10, 2007 10:31:28 GMT
alf, not it is not that hard  however when you prop up something this long you do kind of get a slight amount of bounce, so i was just looking to see what else might be out there as a solution. paul  |
|
|
|
Post by tnimble on Dec 10, 2007 11:11:07 GMT
A simple batten like jig jamesarthur wrote about above would seem the most handy sulotion. Its best compared as a special case shooting board. Nothing wrong with using such a thing.
|
|
|
|
Post by paulchapman on Dec 10, 2007 11:26:45 GMT
Hmm, s'not that hard, is it? I agree. I would do it freehand. Get a few pieces of cheapo pine and practice a few times and I bet you will soon get the hang of it. Start at one end and gradually work backwards. And if the legs are not too thick, cramp a couple of them together, then at least you'll have two pairs the same even if they're are wrong - but they'll only be wrong if you tell people what they should have been  ;D Cheers  Paul |
|
|
|
Post by colincott on Dec 10, 2007 12:05:53 GMT
Hmm, s'not that hard, is it? I agree. I would do it freehand. Get a few pieces of cheapo pine and practice a few times and I bet you will soon get the hang of it. Start at one end and gradually work backwards. And if the legs are not too thick, cramp a couple of them together, then at least you'll have two pairs the same even if they're are wrong - but they'll only be wrong if you tell people what they should have been  ;D Cheers  Paul I have to agree and think you should make a wooden stop for your bench, mark the end of the legs. Doing them in pairs would be best  |
|
|
|
Post by mrgrimsdale on Dec 10, 2007 18:23:54 GMT
I'd start the taper below the rails (or whatever depending on the design) and mark the start point with a pencil line. Then mark the taper itself with a pencil, mark the end grain ends with a marking gauge or knife. Then just join up the marks - without removing them, just like any other planing job.
I'd start at the the thin end but working back so you are not planing against the grain, i.e.taking off shavings parallel to the finished face you are aiming for, as far as possible. Keep checking by eye for high points, or mark high points by passing a straight edge over with pencil lead rubbed on the edge, or just scribble over with 2B pencil to see how you are doing.
Having done one face perfectly you then mark up the next one.
It's just routine normal planing, just the same if it was flat parallel faces, there's no difference at all except slight prob of planing against the grain.
cheers
Jacob
|
|
jmk89
New Member

Posts: 37
|
Post by jmk89 on Dec 10, 2007 19:17:52 GMT
I agree that freehand is the way I would probably do it now - but it might depend on the piece, the degree of taper and how I felt at the time! But the other does work and is quite easy, esp if you are not confident that you can plane to your lines on all four legs.
Also, on the question of an "engineering solution", I think I would have to beg to differ. It is only using the facilities of the hand tool to achieve a goal - it is no more of an "engineering solution" than a shooting board or indeed, using a straight edge to draw your guidelines.
The one advantage is that you can ensure that all four legs are identically tapered - several of the responses note the desirability of pairing, but this technique enables you to check all four at once.
|
|
|
|
Post by Sgian Dubh on Dec 11, 2007 9:57:02 GMT
anyone got an easier way to work it out and make it work??? paul  Have you got a bandsaw Paul? Just make a card template of the desired taper; offer it up to the leg and draw a pencile line; offer the template up to the other face and draw the second line. Do all the legs the same and mark the rectangle required on the end grain of the foot. Square the pencil lines around the top end, at the widest part of the taper. Rip down one tapered face of the leg with the bandsaw as near to the line as you dare, starting at the top end of the taper. Stop the cut about 6- 10 mm before the saw exits at the foot. Switch off the bandsaw and back the blade out-- you don't actually need to switch off the bandsaw if you're confident, just back out with the saw running. This leaves the almost cut through piece hanging on as support for the next bit. Turn the leg through 90º and cut the taper on the other face completely off. Break off the first taper at the foot. Lastly just stick the leg between dogs on the bench and finesse it to the line with a hand plane. Five to ten strokes should do it. You can put the card template back on the leg to mark the line again if you want, but it shouldn't be needed really. With a small amount of practice you should find this method one of the least demanding profiling and hand planing tasks of them all. Slainte. |
|
|
|
Post by tnimble on Dec 11, 2007 11:09:38 GMT
As an add on to the post by Sgian Dubh. When you want to taper more sides of the leg, before planing to the final shape, reattach the offcut with some tape. This gives you again the reference to cut the other taper(s) on the leg with the bandsaw.
|
|
|
|
Post by mrgrimsdale on Dec 11, 2007 11:39:04 GMT
alf, not it is not that hard  however when you prop up something this long you do kind of get a slight amount of bounce, so i was just looking to see what else might be out there as a solution. paul  Don't prop it up but have near the end of the bench so that the plane clears the bench |
|
|
|
Post by derekcohen on Dec 11, 2007 12:04:38 GMT
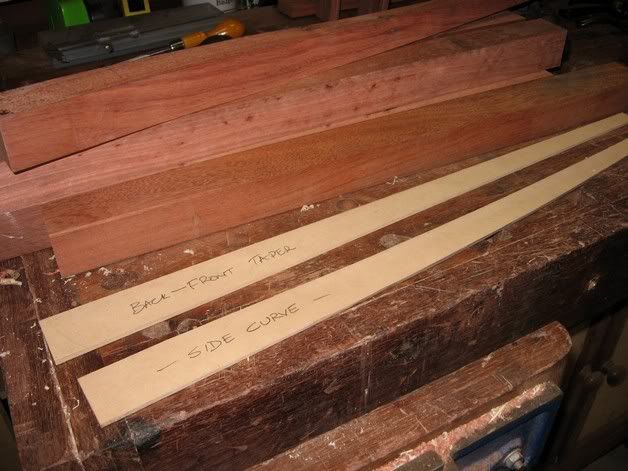
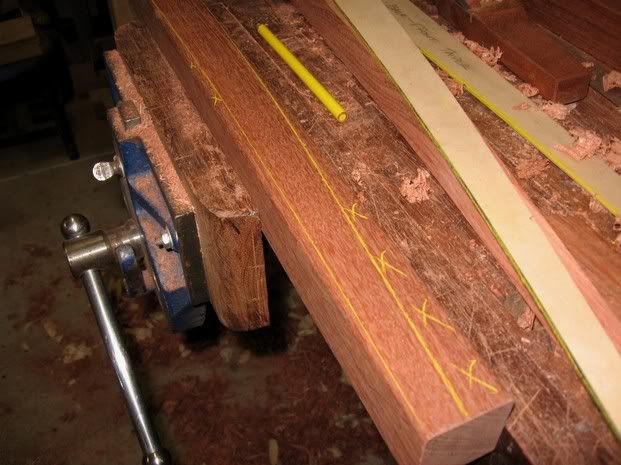
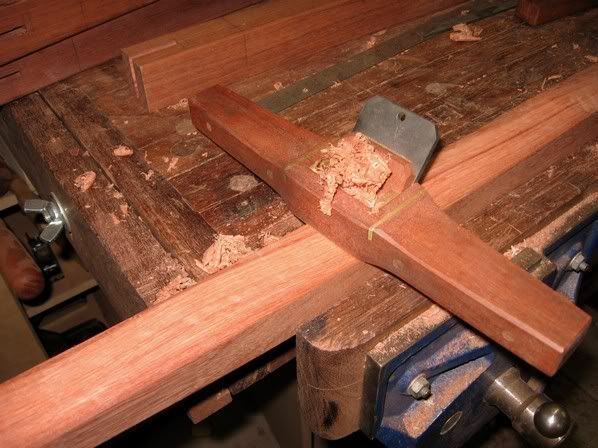
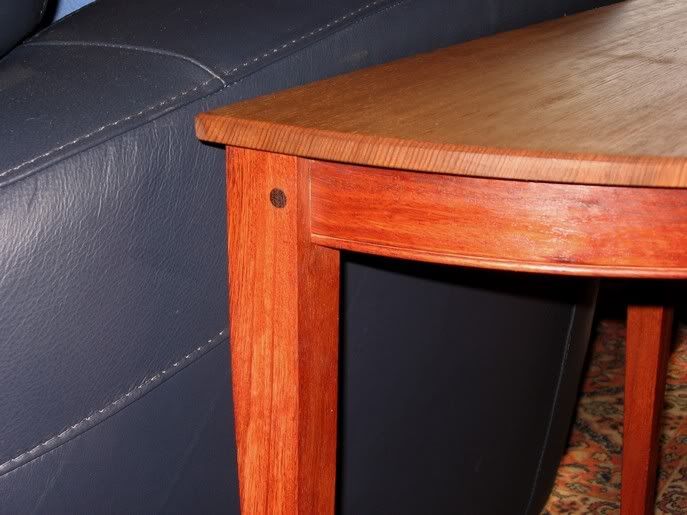
Another strategy to handplane a taper is to do so with the aid of templates. Here is one of a set of two end tables I made early this year.  You will see that the legs taper from each side when viewed from the front, and they curve and taper when viewed from the side. To keep track of what needed to be planed and spokeshaved, I made up two templates in 3mm MDF (one for each taper).  Here is a leg that is marked off on one side (mark opposing sides) ..  Now you can bandsaw away the waste (as Richard suggests) and use this as a shim to hold it square in a vise (as Jeremy suggests), oryou can use a scrub plane and clean up with a spokeshave (as I did here).  Holding the tapered leg in a vise will require shims.  The templates allow you to check your progress if you lose a line. Regards from Perth Derek |
|
|
|
Post by engineerone on Dec 13, 2007 20:30:58 GMT
well having checked out all the superior work on this post, and thought about it at length.  i have fixed an end stop to my bench, and am planing against that. start at the fat end, then at the end go from the square section down to the foot. when i have finished over the weekend will try to get some photos sorted. however i have had to resharpen a number of planes to get is sorted  thanks for input, especially those photos derek paul  |
|