|
|
Post by engineerone on Mar 4, 2008 16:32:05 GMT
after earlier discussions, i have been fettling my veritas scraper plane. also have some other scrapers to deal with. sorted a burnisher, but, how big a lump of metal do you actually burnish over??? should be easy to understand, but since you are creating the edge on the opposite side to the bevel, it seems to be smaller than i expected, so how does it actually cut the wood rather than shave it???  paul  |
|
|
|
Post by paulchapman on Mar 4, 2008 16:52:02 GMT
Paul, Do you have the instruction sheet that came with the plane  If not, go here www.leevalley.com/wood/page.aspx?c=3&cat=1,310&p=48431 and click on "scraping" then on "scraping plane", then on instr at the bottom of the page. The pictures and text explain it all. The only thing I would do differently is how I hold the blade for creating the hook. Put the blade flat side down on a piece of MDF, with the edge of the blade level with the edge of the MDF. That way you can run the burnisher on and off the blade. Run the burnisher along the bevel a few times then gradually alter the angle to create the hook. No need to press hard - just medium pressure. Do it, say, 4 to 6 times and you should have a nice hook. If you do it in a vice, the burnisher is likely to slip off the end of the blade and you could cut yourself  The hook does the cutting and it avoids tear out by the forward-facing angle of the blade acting like a super-efficient chipbreaker which immediately turns the shaving upwards. Also, when re-doing the blade I don't file it. Just hone it in the Veritas Mk2 honing guide set to 45 degrees. Can't go wrong ;D Cheers  Paul PS I'm not sure what you mean by "cut the wood rather than shave it"  You should be getting proper shavings, just like with an ordinary plane, but very fine. If you are not getting proper shavings, you will probably get powder which, in turn, probably means the blade is blunt or is not adjusted properly. |
|
|
|
Post by engineerone on Mar 4, 2008 19:52:23 GMT
thanks again paul i do in fact have the instructions, but for me they are surprisingly difficult to understand for veritas instructions. i find them rather like those for a video recorder  easy for a 4 year old, but not for an adult  i think the drawing is confusing. anyway i will go back and re fettle them. up until now i have not got the fine shavings that people rave about, but have gotten a smooth surface  paul  |
|
|
|
Post by paulchapman on Mar 4, 2008 20:01:02 GMT
Do you have the Vertias #80 style scraper as well ? This one 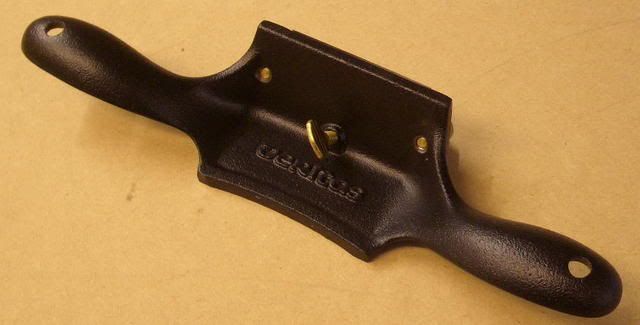 |
|
|
|
Post by engineerone on Mar 4, 2008 21:04:48 GMT
|
|
|
|
Post by paulchapman on Mar 4, 2008 21:10:42 GMT
OK. If it will help, I'll try to do some pictures tomorrow of how I do it. The #80 is easier to set up because you just have to turn one screw. Once you have that working well (and it's very easy in my experience), and you know what it feels like (it should sing if the blade is sharp and set up properly), you can move on to the plane knowing what you are after. That's also quite easy - there are just more options because you can bow the blade and alter the angle, which is why it's best to start with the other one  I'll do some snaps. Cheers  Paul PS If it's working well you should be able to get results like this from really horrible grained wood 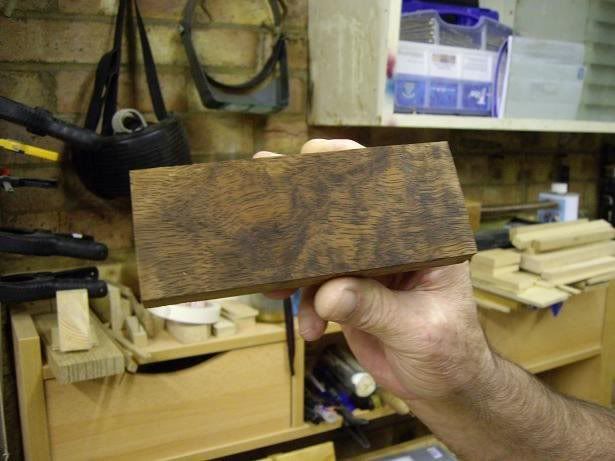 That was a piece of Indian laurel that was impossible to plane without tear out using conventional planes |
|
|
|
Post by engineerone on Mar 4, 2008 22:32:02 GMT
thanks paul i think that would be useful for all of those of us who have or want to use scrapers, either the number 80 type, or the plane, or even hand held ones. paul  |
|
|
|
Post by paulchapman on Mar 5, 2008 16:23:28 GMT
As promised, here are some snaps  I have two scraper planes, the Veritas #80 type  And the Veritas Scraper Plane 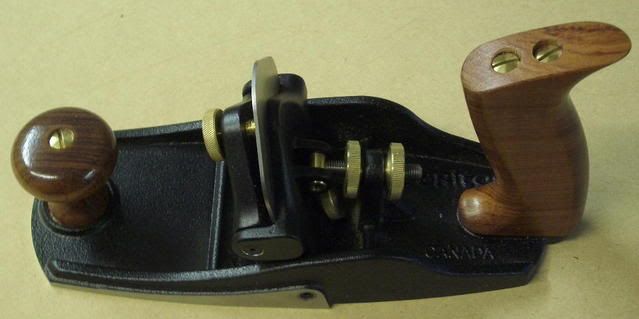 They both do the same job, which one to use depends on the size of the work. The plane obviously has a larger sole 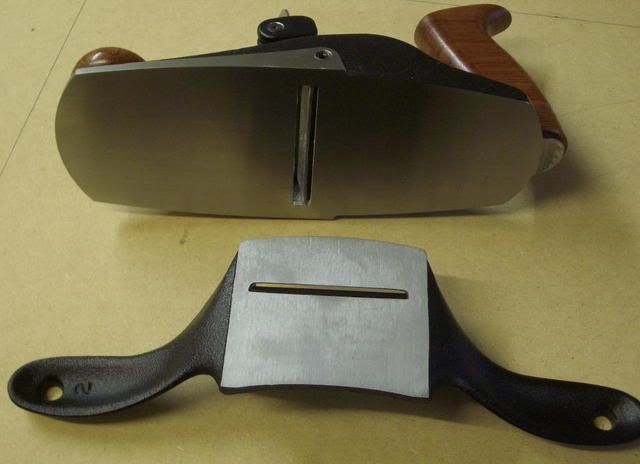 I use a Clifton burnisher 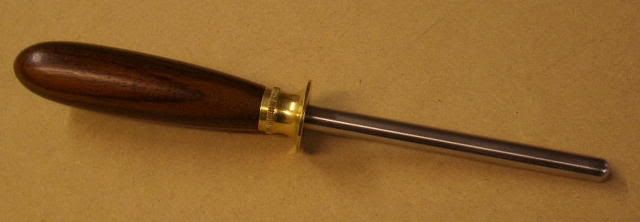 To start preparing the blade, hone a 45 degree bevel on the blade. I use a Veritas Mk 2 honing guide for this but just use whatever method you are happy with. When you have done that, set up a piece of MDF and a block of wood so that the blade is flush with the edge of the MDF 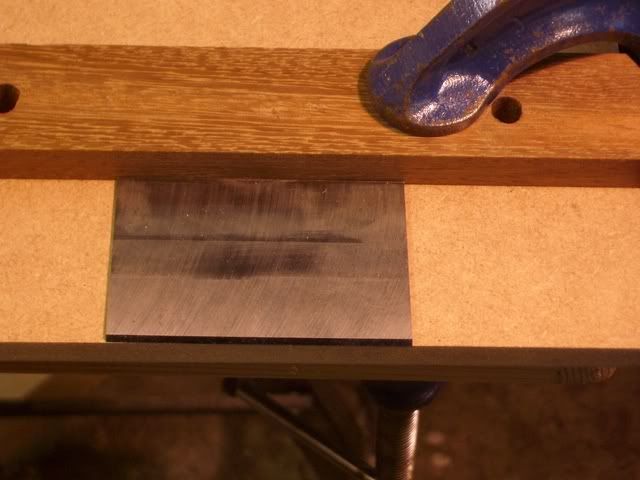 Turn the blade over, so that the bevel is underneath, take the burnisher and, with it dead flat on the blade, run it back and forward about 10 times. This work-hardens the edge of the blade 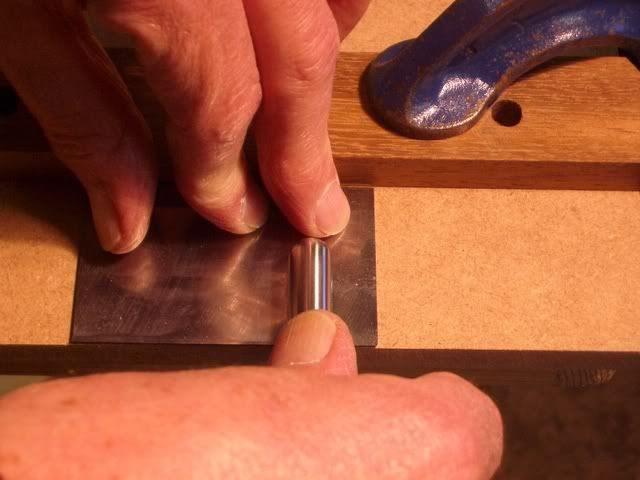 Then flip the blade over so that the bevel is uppermost, rest the burnisher on the bevel and start running the burnisher to and fro along the bevel. Having the MDF flush enables you to run the burnisher on and off the blade  Then gradually lower the angle of the burnisher so that you are turning the edge of the blade over to form the hook. This needs to be about 15 degrees. I just judge it by eye. There is no need to press hard and you only need to run the burnisher across the blade about 4 to 6 times for this last bit. When you have finished the hook should feel a bit like the wire edge you get when you hone a blade. Then put the blade in the scraper body, hook facing forwards and the bevel facing backwards, and set it on a flat wood surface so that the blade is flush with the sole and screw up the two screws to hold the blade firmly 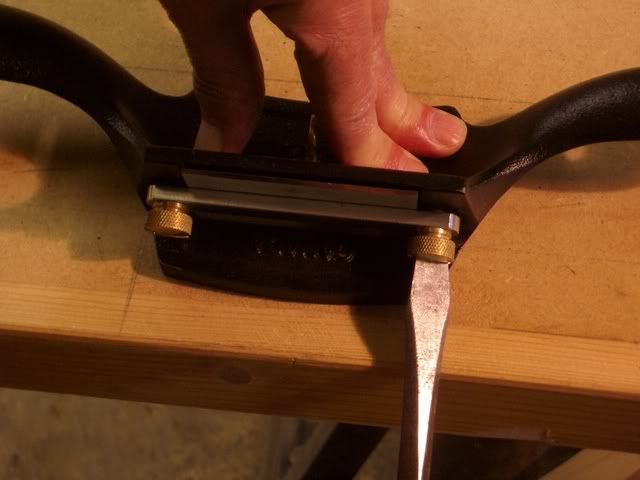 At this point the scraper won't cut. Turn the screw slightly - this will bow the blade and make it project from the sole 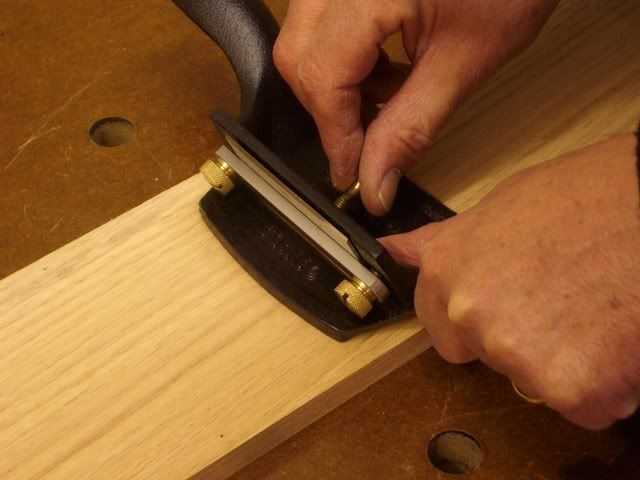 It will then start to cut, giving proper shavings  The more you do up the screw, the deeper the cut, so adjust it to suit the work. Hold the scraper with the thumbs behind the blade  All quite simple really - I don't know why some people make out it's complicated  I'll go and do some snaps of the plane now........... Cheers  Paul |
|
|
|
Post by engineerone on Mar 5, 2008 20:07:04 GMT
paul, it's not that i thought it was difficult  but it is judging what to do and how, if your only point of reference is the instructions, then it is a little intimidating.  your instructions clarify things and make it easier for me to understand. however, i have successfully used my scraper plane after colin sorted it last time, but then i tried to do it myself, and seemed to make a mess  hence the question which you have carefully and properly answered, thanks again paul  |
|
|
|
Post by paulchapman on Mar 5, 2008 20:16:34 GMT
Hi Paul, Sorry, my comment about people making it sound complicated wasn't directed at you - more at some writers. For a long time I was put off trying out scrapers because most things I read implied that it was some sort of black art. In fact, once you get into it, the process is quite straight forward and they are a really nice tool to use. Had to pop out unexpectedly so I haven't done the other pictures yet, and I have to go out again shortly. I'll try to do the others in the morning. Cheers  Paul |
|
|
|
Post by engineerone on Mar 5, 2008 20:59:13 GMT
honest i didn't feel hurt ;D as for popping out, anyone would think you had a life away from the forum   paul  |
|
|
|
Post by paulchapman on Mar 6, 2008 18:05:25 GMT
Hi Paul, Here's a couple of photos of the plane. Once you have the #80 working well, I would suggest that you prepare the blade for the plane and try to set it up the same (I'm assuming here that you have the thin blade that comes as standard with the plane and not the thick one). Put the #80 and the plane alondside one another and set the frog on the plane to about the same angle as the one on the #80 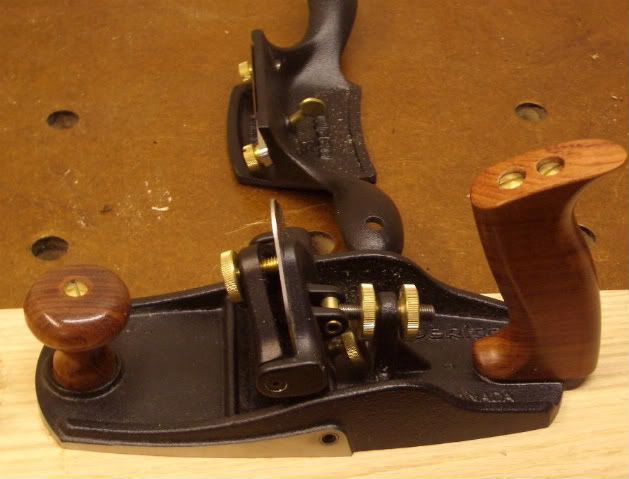 Turning the rear knurled nut anti-clockwise angles the frog forwards and you lock it with the other knurled nut. To angle it backwards, turn the front knurled nut clockwise and lock it with the rear one. Then put the blade in and set it on a flat surface and tighten the lever cap screw, just like you did with the #80. You can then adjust the bow and projection of the blade using the small screw at the base of the frog. You can also adjust the blade by angling the frog forwards and backwards using the two knurled nuts. Angling it forwards for a deeper cut and backwards for a shallower cut. You should get nice, proper shavings as with the #80 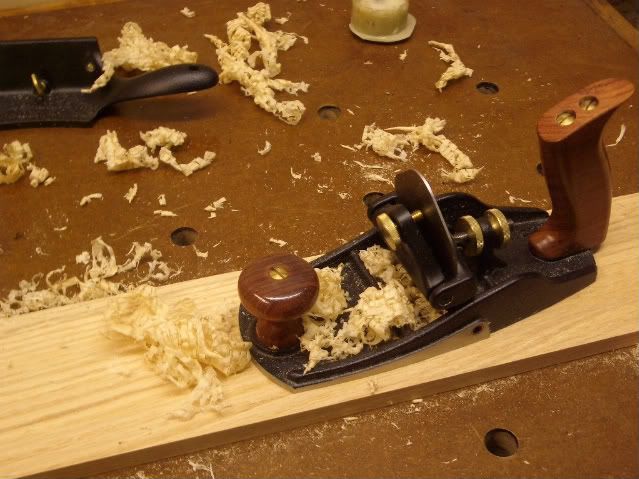 Because there are quite a few adjustment possibilities with the Veritas scraper plane, I think it makes sense to set it up as near as possible to the configuration of the #80 once you have got the #80 working well. If you fiddle about too much with the frog angle, you are likely to struggle to get it to cut well because you will be altering the effective angle of the hook that you've put on the blade. I won't comment on setting it up with the thick blade because I don't have one of those and in any case, that would probably confuse matters ;D Anyway, hope this has been of some help - let's know how you get on........... Cheers  Paul PS When adjusting the frog angle, remember that turning the knurled nuts a small amount has a big effect, so adjust them less than a quarter of a turn at a time. |
|
|
|
Post by Alf on Mar 6, 2008 18:39:59 GMT
fwiw, El Presidente's advice from a coupla years back: It's a while since I used the LV scraper plane (damn bevel-ups have removed the need thus far, curse them) but the review contains as much as I recall, fwiw. It certainly was a lot easier than the un-bowable blade of the LN, that I do recall. The trying-the-burr-outside-the-plane tip is a good 'un, as is adopting a policy of only altering one thing (burr, angle, projection or bow) at a time, otherwise you can end up chasing your tail. On the whole I'd recommend getting happy with a card scraper first, and once you're happy with the burr on that it really lessens the learning curve on the "scraper holders". Cheers, Alf |
|
|
|
Post by engineerone on Mar 6, 2008 19:10:05 GMT
thanks alf very useful as usual. look i'm getting old, need to learn a lot in a short time hence pushing to do many things  ;D paul  |
|
|
|
Post by paulchapman on Mar 7, 2008 13:23:09 GMT
One thing I forgot to mention, Paul, is that scrapers do not work so well on soft wood like pine, so when you are trying it out use hardwood. Cheers  Paul |
|