|
|
Post by engineerone on Oct 30, 2008 20:00:52 GMT
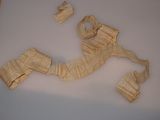 not spent too much time working in wood over the last couple of weeks, one reason being i was concerned by the amount of tear out i was getting on the cherry i was using. however last couple of days i made a concerted effort to do some more, and find an answer to the problem. last weekend i bought the latest copy of popular woodworking october 2008 issue. in it chris schwarz has an article about minimising tear out. one of his suggestions was to increase the cutting angle, whilst using a bevel up plane. in addition he also talks as others have about opening the throat, and also moving the cap iron higher up. so i took out my ln bu 164 and my veritas mk2 grinding jig and adjusted things to 50 degrees. because of the small extension of the blade it was a little difficult to get the blade right, but eventually i sorted it, and managed to get a decent curve on the edges too. after honing, i replaced it, and taking one of the pieces that had shown a lot of tear out before, i found i had sorted the problem. the blade was sharp before so i can only assume that the attack angle change was the answer. today i sawed up a three larger pieces and made six from them then planed them to the same sizes. so far no breakout, so i am well pleased. the other interesting result was that with this higher angle i was able to take thicker shavings than i had before been able so to do. one of the schwarz points was that we have kind of spent too long worrying about taking paper shavings, when in fact the need is to remove wood. so the picture above is a for me medium shaving, but is about 14 inches long, and in one piece, therefore a decent shaving. my only real problem now is that because my little finger is deformed, the shape of the rear tote is causing me painful problems. not sure how to avoid it though, without making another tote. must try an lv bu. ;D paul  |
|
|
|
Post by modernist on Oct 30, 2008 20:13:50 GMT
Is a 164 a low angle jack or smoother?
What is the total cutting angle?
I am also having similar problems on wild cherry
cheers
Brian
|
|
|
|
Post by engineerone on Oct 30, 2008 20:20:37 GMT
i have both, the 62 and the 164 and both have a 12 degree bed, so with the blade at 50 degrees, you get 62 degrees. on the ln site they are under block planes. the 164 is a smoother and 62 the jack. paul  |
|
|
|
Post by mrgrimsdale on Oct 30, 2008 21:22:50 GMT
Have you got sharp enough blades? If it's difficult wood why not belt sand it? It's the end product that counts, not the shavings.
cheers
Jacob
|
|
|
|
Post by modernist on Oct 30, 2008 22:52:28 GMT
Have you got sharp enough blades? If it's difficult wood why not belt sand it? It's the end product that counts, not the shavings. cheers Jacob I'm beginning to understand why you are not a fan of JK  Brian |
|
|
|
Post by sainty on Oct 30, 2008 22:59:38 GMT
in addition he also talks as others have about opening the throat, and also moving the cap iron higher up. paul  Paul, what's the theory behind opening the throat and moving the cap iron? I thought that you closed the throat on difficult timbers? rgds Stu |
|
|
|
Post by paulchapman on Oct 30, 2008 23:22:30 GMT
in addition he also talks as others have about opening the throat, and also moving the cap iron higher up. Paul, what's the theory behind opening the throat and moving the cap iron? I thought that you closed the throat on difficult timbers? While I can see the point about moving the cap iron up, I'm also baffled about the suggestion of opening the mouth  Most texts say close up the mouth and set the cap iron as close as you can get it to the edge of the blade. However, if you do this, there is so little room for the shavings to get through that they jam. I've found that the best way is to use a very tight mouth but don't have the cap iron too close the the edge of the blade - and, of course, use a very sharp blade. Cheers  Paul |
|
|
|
Post by engineerone on Oct 30, 2008 23:24:13 GMT
stu i am not sure it is a theory, but.. when i was previously having problems with the length of my shavings paul chapman suggested trying opening the throat, and more importantly moving the cap iron back more. chris schwartz suggests that having the cap iron too near the cutting edge can actually cause more problems than it solves, because it tends to break the chip up and cause it to roll into the mouth and thus cause more problems. my limited experience with moving the chipbreaker/cap iron back you get a better curl on the shaving, and it moves through the mouth and up better. remember early planes did not have chip breakers, and many older wooden planes don't have them either. the impression must be to do a dual fold idea, allow for thinner blades, and also to make adjustment of the blade easier. paul  |
|
|
|
Post by paulchapman on Oct 30, 2008 23:28:09 GMT
paul chapman suggested trying opening the throat Did I really say that   Just gone back and looked at the old post - I only said move the cap iron back. I didn't say open the mouth. You had me worried for a minute........ |
|
|
|
Post by sainty on Oct 30, 2008 23:55:04 GMT
I've just gone back to the start of his thread and realised that you are talking about a bevel up plane, so there is no chip breaker as such as I was thinking. (Can you move the cap iron on a BU plane?) So three things were changed, the blade angle, the blade sharpness and the opening. The first two are traditionally used to deal with wild timber and the third goes against recommended theory and might not have been advice at all (PC)!
Is it possible that your first attempts were with a dull blade? It would be interesting to see if you get breakout with the mouth closed up again.
rgds
Stu
|
|
|
|
Post by engineerone on Oct 31, 2008 0:36:01 GMT
hi stu, and paul. i agree paul you did say move the chip breaker, but after doing that with one of my normal planes ie bd, i found that moving the frog back/opening the mouth helped too. on the lv bu's stu there is something similar to a chipbreaker in that it has a lovely brass cap iron which puts pressure on the blade to allow it to be restrained, and also work the mechanism. in fact i have tried all the things you mentioned. previously i had sharpened the blades in normal state ie with the overall angle at 37 degrees, and did get the break out. so having read chris's article i had no problem thinking it was worth trying the larger angle since it only required a few moments re honing. the planing is easier, the shavings more reproduceable, and the finish fine. and indeed i did find that opening the mouth slightly gives me a better finish. it appears that the advice about closed mouths and chip breakers being near the edge goes back about 150 years, so it is about time it was revised and reviewed. i guess what you have to do is ask the question what do the combinations give you. in the old days when racing motor bikes, before computers, we made notes of what we did, but always started from a base level, and only changed one thing at a time. so i would guess the answer for anyone else who thinks i am talking out of an unusual orifice, is for you to try. start with a sharp blade in your normal angle. set the mouth and cap iron as you would normally, then plane an odd wood like cherry. see what happens. then begin by re sharpening to the same angle, and then move the cap iron, and see. finally move the mouth/frog to mouth relation ship. next move the cap iron back to where you were. what do all these things give you?? if you are still getting tear out, then it is time to look for another approach. for instance on a normal bd, use the dc method and put a back bevel or what is sometimes called a knife edge on. carry out the same steps with the iron and the mouth. if you have a bevel up then try what i did. re sharpen the blade at an angle above 25 degrees, up to 50 but you could try in stages of say 5 degrees. start with a closed mouth, and then see what happens with a wider mouth. the brass fitting can be moved further back when you have done other things. i planed six separate pieces after adjusting the plane, and found it easier and no tear out on any of those pieces. it was also easier to plane them. so i cannot say i have found a new method, only that one that others have recommended is actually quite good for me using the cherry i have in stock at this time which had previously caused me some problems.  hopefully that makes is easier to understand  paul  |
|
|
|
Post by engineerone on Oct 31, 2008 1:07:58 GMT
since you asked stu i tried another experiment. i am lucky enough to have a bunch of aromatic cedar lying around. this is rough cut, so i tried the la long jack no 62 on it with the blade at 50 degrees. i know cedar is not too difficult a wood, so it was in some ways a better wood to work on. i started with the mouth as i had left it after the cherry. it produced pretty decent shavings. then i closed the mouth up (it's adjustable ;D) and it started to produce almost sawdust rather than shavings. i then went on and tried again with the wider mouth. again proper shavings rather than dust. so not too scientific but a practical set of answers i hope  got to say the finish on the cedar is very smooth and sweet. paul  |
|
|
|
Post by paulchapman on Oct 31, 2008 1:10:52 GMT
hopefully that makes is easier to understand  Not really ;D When dealing with tear out there are various things you can do. You can try a steeper angle on a BU plane or a back bevel on a BD plane, but I don't favour that. 1. Try a tight mouth with a finely set, very sharp blade, with the cap iron set back a bit. 2. Use a #80 style scraper or a scraper plane. This table top was cleaned up entirely with a scraper plane because I needed to guarantee there would be no tear out 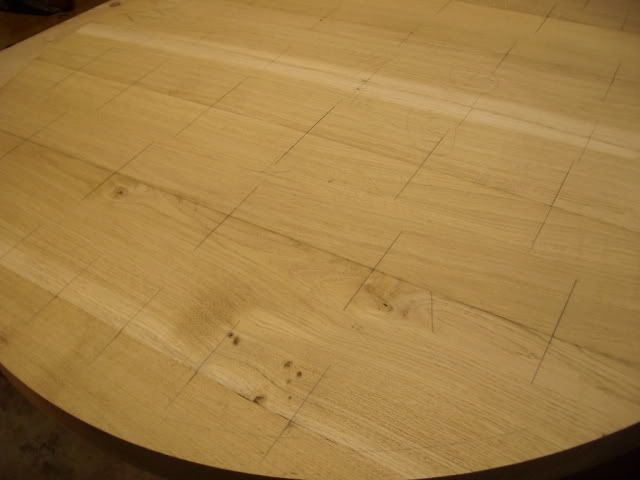 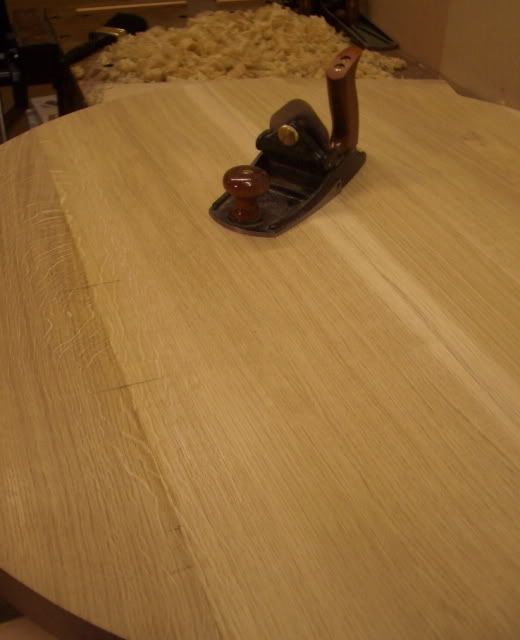 3. If you have a lot of material to remove, try a toothed blade in your plane (you can get them in BU or BD) and use it a bit like a scrub plane 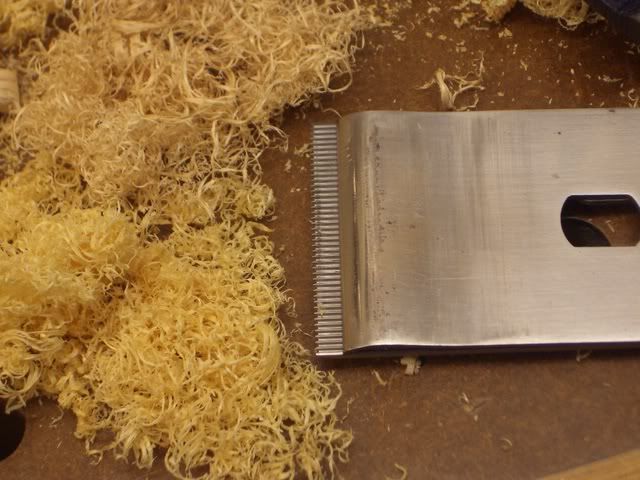 Use it across the wood at about 45 degrees like this 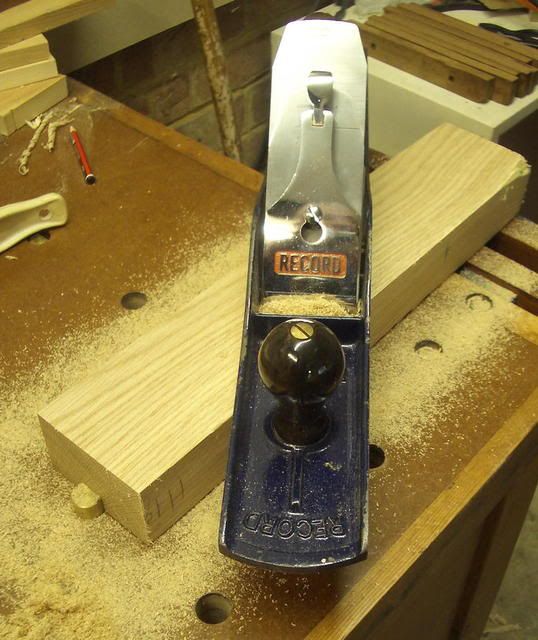 You won't get any tearout. It will leave a hatched surface which can then be removed with an ordinary plane to leave a silky smooth finish. Practice these methods and preferably have different planes set up for them - then when the occasion arises, just pick up the plane and off you go. Hope this helps. Cheers  Paul |
|
|
|
Post by engineerone on Oct 31, 2008 1:25:08 GMT
how come it's us old buggers up at this time paul ;D as usual your work shows another and in some ways better way of doing things. however, the method i have proposed also works. it is one of the reasons why ln offer spare blades and also different frogs, ie york pattern with a steeper angle for bd planes. i must say though i am intrigued by your feeling that using your recently obtained toothed blade should mean that after that using a normal plane would not give you tear out. the article by chris talks about skewing the plane, it seems to be an old fashioned approach which can works sometimes, and not others, again it depends i think on how the wood has been cut, and how the grain goes. chris says that the more he skewed the plane, the more he had tear out. not always, but sometimes. it seems that because of the way in which some grain can change in the length of what you are planing, the angle of attack of both blade and plane can differ across the length, so the first step to avoiding tear out is reading the grain  paul  still learning and being impressed as to how small changes can make a big difference. now all i have to do is sort out my scrapers properly  |
|
|
|
Post by paulchapman on Oct 31, 2008 7:30:19 GMT
as usual your work shows another and in some ways better way of doing things. I don't have any machinery and have to do all my planing by hand - if I didn't find ways that actually worked, I'd be there all bloody day ;D The point about skewing the plane is that you are lowering the pitch, which is the opposite of using a higher effective pitch for your blade - hence more tear out. The toothed blade technique is something I learnt from that bloke with the unpronounceable name from Lie Nielsen. It really works. Not many people seem to know about it - although from stuff I've read, musical instrument makers, who frequently work in difficult, exotic woods, often use toothed blades. I've tried using a higher effective pitch (back bevel on a BD plane). David Charlesworth currently advocates the technique. I've tried his Lie Nielsen #5 1/2 with a back bevel and, frankly, wasn't impressed. Compared with a well set up scraper plane, a plane with a higher effective pitch is much harder to push and it doesn't always work well on very difficult grain. With a scraper you can virtually guarantee it will work. From the stuff you are writing, I wonder if you are still having trouble getting your blades really sharp  One thing I do find useful is to have some planes set up for specific tasks. To have to keep farting about changing angles and stuff justs wastes so much time. Better to have some spare planes or at least some spare blades set up, ready to go. Cheers  Paul |
|
|
|
Post by mrgrimsdale on Oct 31, 2008 8:31:49 GMT
Sounds like plane talking from the horses mouth!
What's the difference in use between a #80 style scraper and a scraper plane? I've got the scraper but the planes are bloody expensive.
cheers
Jacob
|
|
|
|
Post by paulchapman on Oct 31, 2008 9:14:23 GMT
What's the difference in use between a #80 style scraper and a scraper plane? Hi Jacob, The only real difference is size. I have the Veritas #80 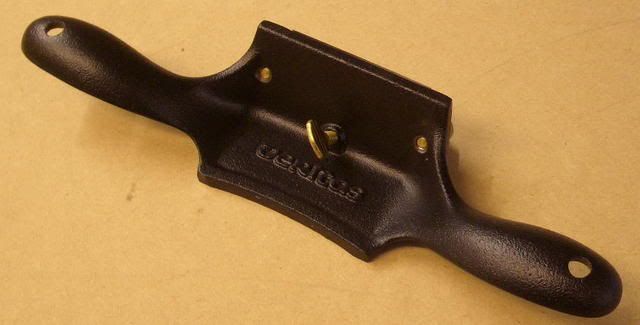 and the Veritas scraper plane 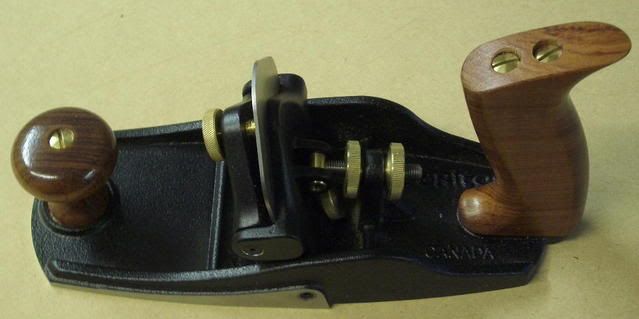 Here's the difference in the size of the soles 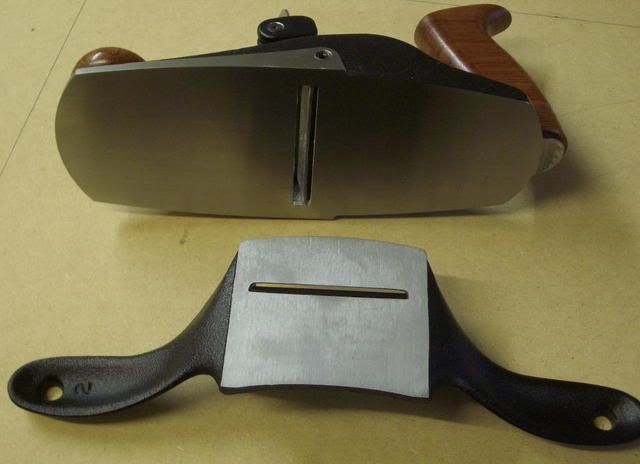 For smaller work the #80 is fine but for something like a table top the plane will give a better result in terms of ensuring that the work is kept flat. The plane is slightly more of a fiddle to set up but once you have the hang of it it's dead easy and repeatable. Cheers  Paul |
|
|
|
Post by mrgrimsdale on Oct 31, 2008 9:32:22 GMT
So an ideal sequence for a table top, e.g. sycamore with some wavy grain, would be normal smoothing plane, toothed plane, scraper plane, hand scraper?
Or can you go from toothed to smoother?
cheers
Jacob
|
|
|
|
Post by paulchapman on Oct 31, 2008 9:57:22 GMT
To date, I've used the toothed blade mainly when working on sawn stock. Take off the high spots with a scrub type plane (I use my #7 with a steeply cambered blade). Then use the toothed blade in the #7 taking fairly aggressive cuts across the board at about 45 degrees and finish off with the #7 with a normal blade. This should give you a good finish. When it come to the fine finishing, after you've jointed the boards together, it all depends how much wood you can take off while retaining the final thickness. If you've prepared the boards carefully and used biscuits or loose tongues for alignment, the boards should be pretty flat and will not need much drastic planing. Plane the underside first and see whether you are getting tear out - if not, use a normal plane and blade with a fine set and tight mouth. If you are getting tear out, use a scraper plane or back bevel or toothed blade followed by smoother as appropriate - of those three options, use whichever you are most comfortable with and which best suits the work. The toothed blade might be too drastic for finishing if the wood is near final thickness. Incidentally, by smoother I don't necessarily mean a #4 - I would use anything from a #3 to a #7 as a smoother depending on the size of the work. Difficult to generalise because it depends so much on the particular piece and nature of the wood, but I'd do it something like I've described above. Cheers  Paul |
|
|
|
Post by engineerone on Oct 31, 2008 11:38:56 GMT
paul, i bow to your greater experience hunched over the bench blowing steam out of various orifices ;D but. as you are aware from our various chats i do not claim to be very experienced at planing, but i have become better at sharpening, and the work on my table shows that i have basically mastered the process. i do believe that my blades are sharp enough. mind you we might both have different ideas of sharpness  with all the talk from dc and then chris i thought it would be worth a trial, and then worth commenting on. i agree that if you can, you should have dedicated planes, but that can become as expensive as buying a pt. ;D thing to remember is that i had used my mafell ad160 to size the wood previously, and had mainly experienced break out when finishing the timber to size, so i was taking quite thin shavings. these particular pieces i cut down for use on the lower shelf on my cherry table, so it was a cheap and easy experiment. i just made the adjustment on one of my cmt diamond stones, about 5 minutes in total, and that including the removal of the wire edge and honing both front and rear, using the leather strop and the cmt powder. from my point of view the change from the normal cut to the high angle was dramatic in terms of performance. as an interesting point later last night whilst trying it out on the cedar, i also tried my lv no 6 which is conventional, but has the cap iron further back, and it cut ok, but not really better than the 62. as i said, the smaller mouth caused more sawdust like shavings, whereas the wider mouth gave a better length of shaving. so at this time from the point of my minimal usage, i think it works well, maybe it is over kill, but for me it has been worth the experiment.  paul  |
|
|
|
Post by paulchapman on Oct 31, 2008 11:57:09 GMT
It's a constant learning process, Paul. I'm learning all the time - I keep watching others and reading stuff and see what tips I can pick up. Then try it out and see what happens. That's what's good about being a happy amateur - if I had to earn my living at it, I'd probably bung it all through a sander ;D Cheers  Paul |
|
|
|
Post by engineerone on Oct 31, 2008 12:31:42 GMT
as you say continuous learning, but think about the fact that for years you only used your planes, then in the last couple of years have sprung for the lv scraper plane and no 80, and only this year have you found the value of the toother plane, and only then by seeing it in action  so the fact is that we all find different ways to get the same result ;D and the next man may well not be able to use our method. none the less any new data that someone has found has worked may well move your own learning curve forward even if not in the exact same way. for instance jacob wonders whether you will need to undertake at least 4 separate operations. well of course in the olden days when all was hand done,(although i'm not sure how long ago that was, since people were always looking for ways to reduce labour costs  ) that was what happened, and rather like the drawers on his chest, it may well be that the gophers did the first work, and the master ended up doing the final bit which need more finesse.  paul  |
|
|
|
Post by paulchapman on Oct 31, 2008 12:43:40 GMT
think about the fact that for years you only used your planes, then in the last couple of years have sprung for the lv scraper plane and no 80, and only this year have you found the value of the toother plane, and only then by seeing it in action  That's the value of the internet and things like woodworking forums. I've learnt more about woodworking in the last two or three years than in the previous 60 thanks to the internet, forums and meeting lots of other woodworkers. Before that it was just what I was taught at school and what I picked up through books and magazines. Wonderful thing this technology. I've met so many people and learnt so much........... Cheers  Paul |
|
|
|
Post by engineerone on Oct 31, 2008 12:52:40 GMT
i agree i've even made some friends   paul  |
|
|
|
Post by mrgrimsdale on Oct 31, 2008 13:47:29 GMT
snip I've learnt more about woodworking in the last two or three years than in the previous 60 thanks to the internet, forums and meeting lots of other woodworkers. snip Same here, especially now I'm doing more hand tool stuff. Although I learned about sharpening (seriously, it works  ) by ignoring just about everything I've read on the net ;D |
|


 ) by ignoring just about