Post by RogerM on Nov 13, 2008 18:08:15 GMT
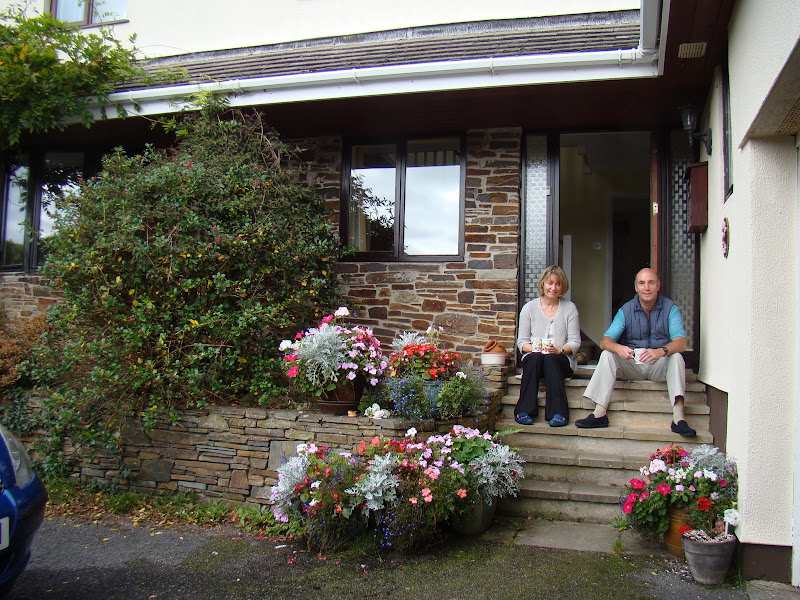
We've just come back from a walking holiday in New England where everyone has an undercover porch. One of our favourite spots to sit with our coffee is the front doorstep which catches the sun from late morning.

The area under cover is as dry as dust and nothing will grow apart from near the front edge, and what does grow blocks the view from the hall window.

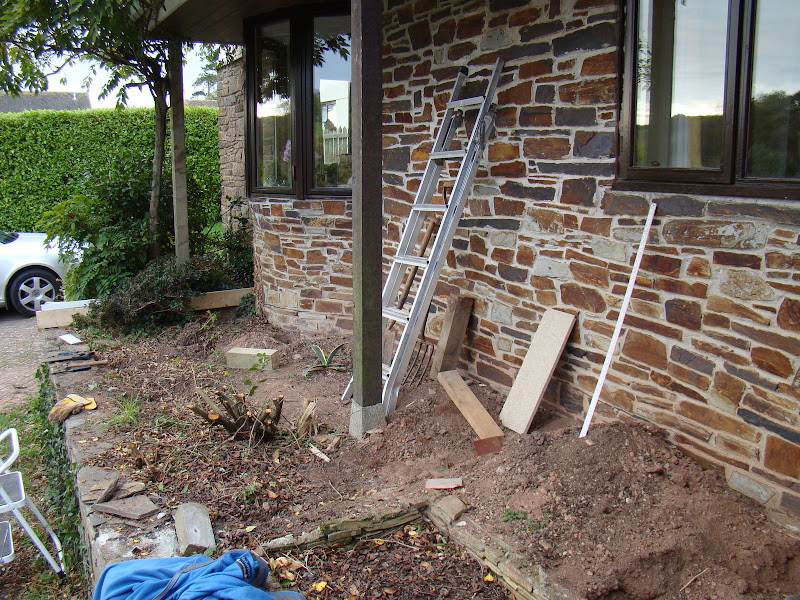
My immediate idea was to clear the plants, throw a couple of bags of gravel down and put a seat on it. Then SWMBO stuck her twopen'orth in, and so a deck was born! First, clear the ground. That support post will be in the way so will have to go for a start.

Not sure how much support it was giving anyway.

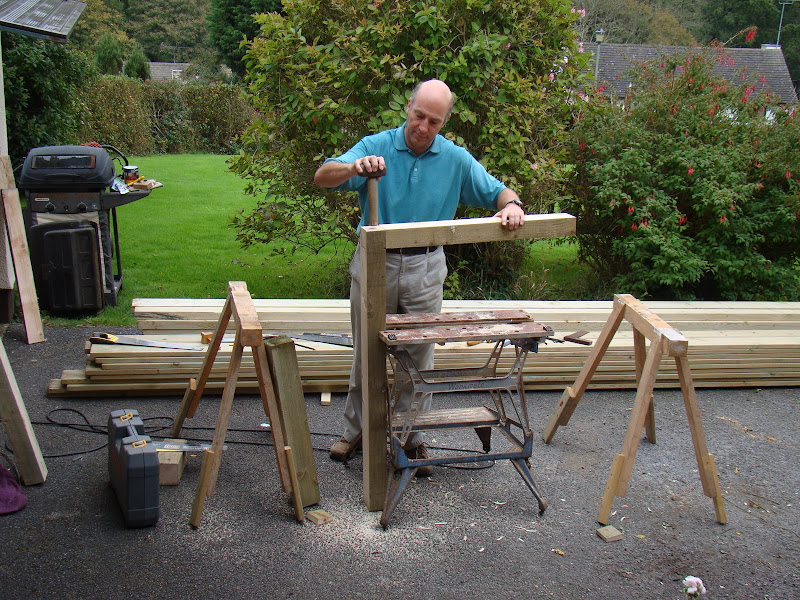
The support post will be replaced by a bracket made from 100mm x 75mm tanalised timber, using a single large dovetail for the joint.

Routing out the housing to take the diagonal brace.

The bracket is attached to the wall using expansion bolts in the larger stones. I don't think it's going anywhere in a hurry - maybe I was a gibbet maker in a former life.

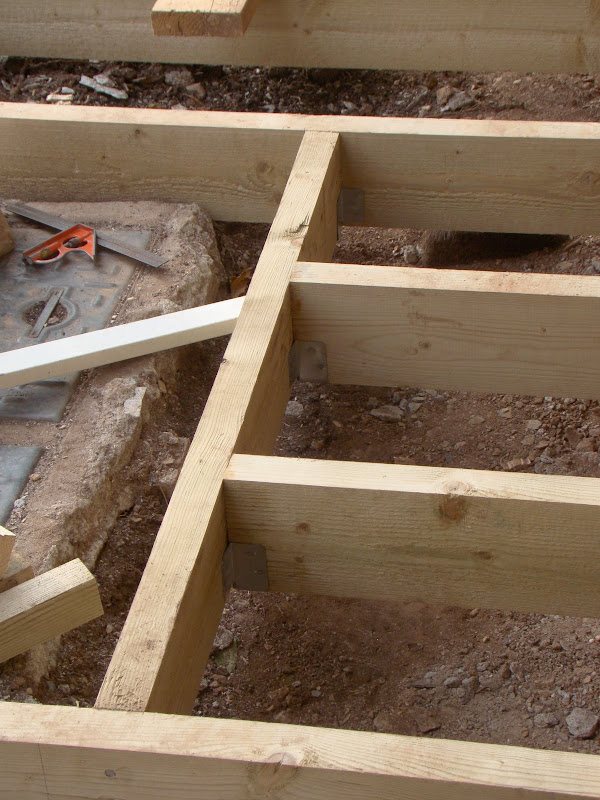
The support frame is made of 150 x 50 treated, with a 30mm fall from back to front for drainage. The frame is supported against the house by a 150 x 50 beam bolted to the wall, but kept off it by 5 x galvanised steel washers between the beam and the wall. The front of the frame is supported by a 100 x 50 wall plate resting on a strip of dpc on the retaining wall. To keep the surface of the deck more than 150mm below the dpc and flush with the nearest front step, it was necessary to lower the frame by 75mm, which was achieved by cutting a 40mm notch in the wall plate and a 35mm cutout on the frame. To get the required fall of 30mm for drainage, a 100mm cutout was needed from the frame where it rested on the 100 x 50 wall plate at the front. This left only 50 x 50 of the frame, so to provide additional support I used joist hangers so that there was support from the bottom of the 150 x 50 frames. The use of joist hangers is possible overkill, but I don't think that frame is going to move.

A large hatch had to be formed to enable access to a double manhole, and mini joist hangers were used to provide support here, as well a some hefty 150mm galvanised nails driven through into the end grain.

The support frame is now complete. All that work, and now to conceal it forever!

First I attach boards parallel with each edge to form a "picture frame". The remaining decking is infilled diagonally. I cut some small blocks with a 5mm thick edge to space each piece of decking.

I then noticed that the double sided decking I was using did not have the same pattern on both sides, and that parts of the "picture frame" were from the "other side". Most visitors wouldn't notice, but to me it stood out like a dogs wotsits. Aaaaghhhh!

Having lifted and replaced the offending pieces of decking, the remainder was laid without incident. The hatch was marked out "in situ" and each piece of deck lifted and cut, and then replaced, screwing it down to a simple subframe to form the hatch.

Finally, the edges were finished with a decking fascia.

Overall, I'm very happy with the result, and so is SWMBO. This is the first deck I have ever made, and apart from not noticing that the decking had different sides until it was almost too late, I don't think I would do anything differently. It looks a bit stark at the moment, but I'm planning some timber plant troughs to go along the front edge which should soften it. Overall dimensions are 6m x 2.2m. Treated timber came to £325, plus about £60 for bolts, screws, nails, joisthangers and preservative for the cut end grain. I don't think I would have attempted that particular pattern of decking without a SCMS , bought for the job and which was my perk for doing the job! This is a super piece of kit, and the laser line designation was an absolute godsend.
The area under cover is as dry as dust and nothing will grow apart from near the front edge, and what does grow blocks the view from the hall window.
My immediate idea was to clear the plants, throw a couple of bags of gravel down and put a seat on it. Then SWMBO stuck her twopen'orth in, and so a deck was born! First, clear the ground. That support post will be in the way so will have to go for a start.
Not sure how much support it was giving anyway.
The support post will be replaced by a bracket made from 100mm x 75mm tanalised timber, using a single large dovetail for the joint.
Routing out the housing to take the diagonal brace.
The bracket is attached to the wall using expansion bolts in the larger stones. I don't think it's going anywhere in a hurry - maybe I was a gibbet maker in a former life.
The support frame is made of 150 x 50 treated, with a 30mm fall from back to front for drainage. The frame is supported against the house by a 150 x 50 beam bolted to the wall, but kept off it by 5 x galvanised steel washers between the beam and the wall. The front of the frame is supported by a 100 x 50 wall plate resting on a strip of dpc on the retaining wall. To keep the surface of the deck more than 150mm below the dpc and flush with the nearest front step, it was necessary to lower the frame by 75mm, which was achieved by cutting a 40mm notch in the wall plate and a 35mm cutout on the frame. To get the required fall of 30mm for drainage, a 100mm cutout was needed from the frame where it rested on the 100 x 50 wall plate at the front. This left only 50 x 50 of the frame, so to provide additional support I used joist hangers so that there was support from the bottom of the 150 x 50 frames. The use of joist hangers is possible overkill, but I don't think that frame is going to move.
A large hatch had to be formed to enable access to a double manhole, and mini joist hangers were used to provide support here, as well a some hefty 150mm galvanised nails driven through into the end grain.
The support frame is now complete. All that work, and now to conceal it forever!

First I attach boards parallel with each edge to form a "picture frame". The remaining decking is infilled diagonally. I cut some small blocks with a 5mm thick edge to space each piece of decking.
I then noticed that the double sided decking I was using did not have the same pattern on both sides, and that parts of the "picture frame" were from the "other side". Most visitors wouldn't notice, but to me it stood out like a dogs wotsits. Aaaaghhhh!
Having lifted and replaced the offending pieces of decking, the remainder was laid without incident. The hatch was marked out "in situ" and each piece of deck lifted and cut, and then replaced, screwing it down to a simple subframe to form the hatch.
Finally, the edges were finished with a decking fascia.
Overall, I'm very happy with the result, and so is SWMBO. This is the first deck I have ever made, and apart from not noticing that the decking had different sides until it was almost too late, I don't think I would do anything differently. It looks a bit stark at the moment, but I'm planning some timber plant troughs to go along the front edge which should soften it. Overall dimensions are 6m x 2.2m. Treated timber came to £325, plus about £60 for bolts, screws, nails, joisthangers and preservative for the cut end grain. I don't think I would have attempted that particular pattern of decking without a SCMS , bought for the job and which was my perk for doing the job!
 This is a super piece of kit, and the laser line designation was an absolute godsend.


