|
|
Post by modernist on Mar 9, 2008 22:28:50 GMT
I've spent a bit of time studying German style tilt and turn windows. As I am making a pair now I thought I'd record progress in stages (Nibbo fashion) and add to it each weekend. What I need is a pair these but in a different size  All sections except the centre muntin are 80 x68 and I prefer columbian pine because of it's weather resistance. I haven't got 3 grand spare so I am using adjustable groovers and normal rebate blocks, rather than the specialist tooling which makes life a lot easier. These windows were designed to be machine made, so it is savage amusement to some extent, but it is difficult to always work from the face side so it pays to thickness exactly. I use a vernier caliper and the dial guage on the thicknesser. If you don't have one of these and it has a 2mm pitch I recommend you buy one from Felder and stick it on with blue tack  Both the outer frame and sashes have similar section for the stiles and top and a different section for the bottom rail. Unlike "normal" windows these have the seals and mechanism on the opening sash and are also glazed internally (in this case with triple glazing, K glass and argon filled to give a U value 0.8W/m2/deg C. We are going toi use a candle for heating ;D Starting with the outer frame the timber was prepared.   Yes I can see it is .05mm out but I'm not perfect   At this point is is advisable to match the grain as well as possible as it can create some strong unwanted contrasts with columbian pine. 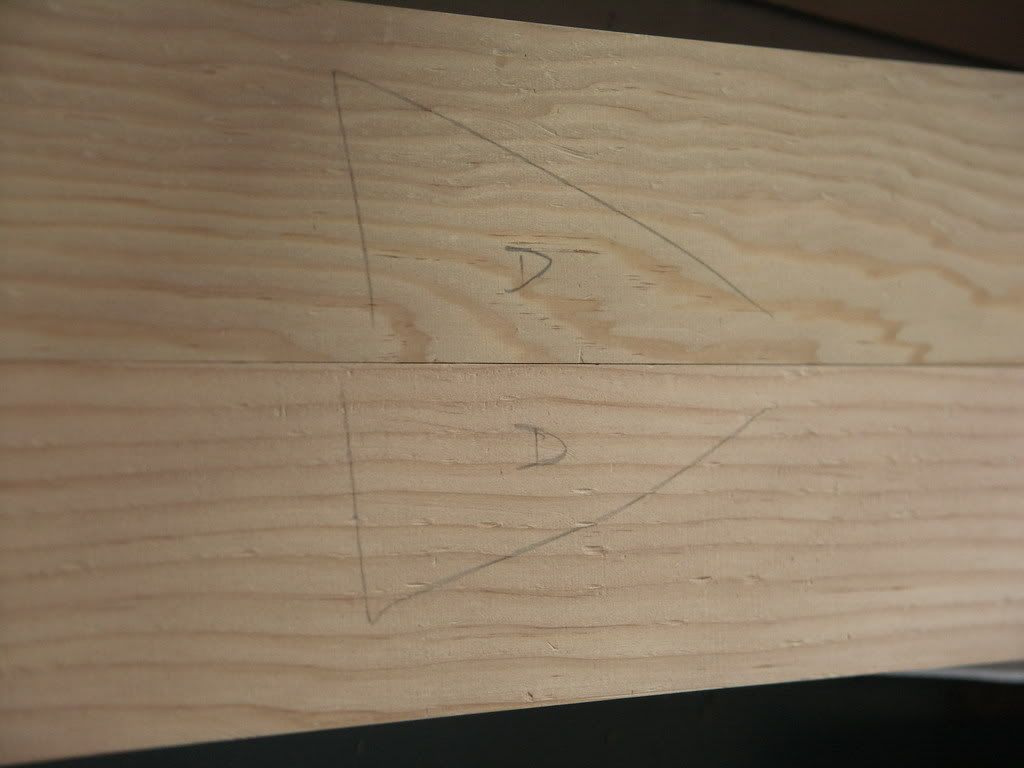 With a bit of planning where the rebates go it is also possible to accomodate some shakes which will be milled off later the outer sections are:- 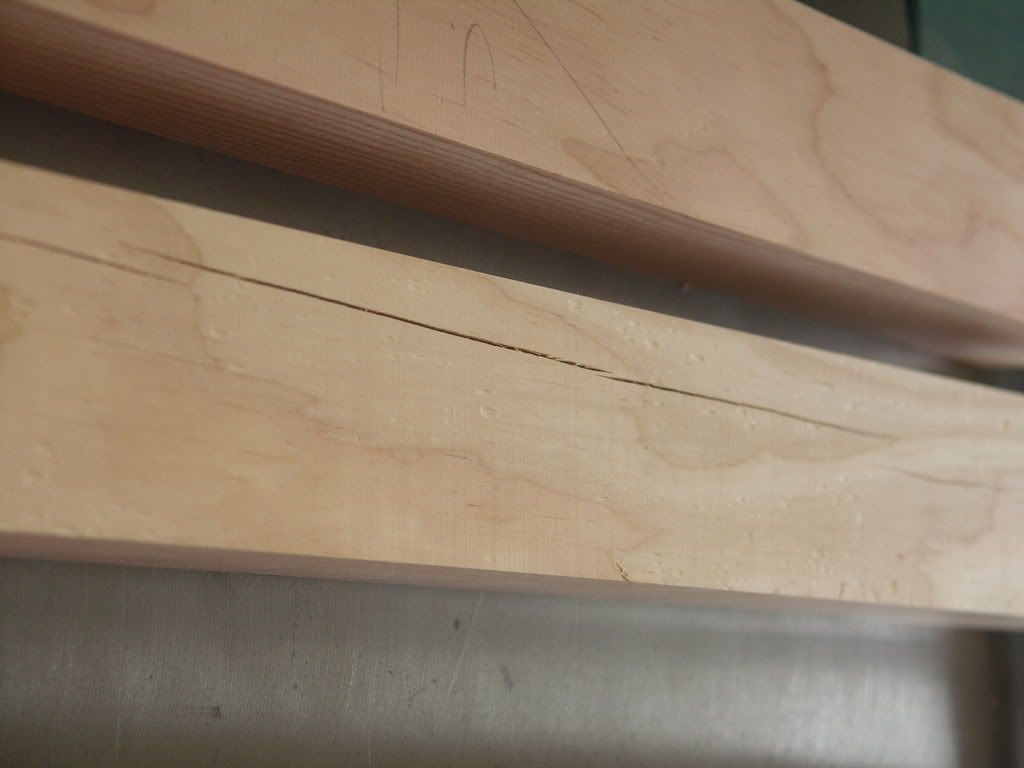  It is best to cut the twin bridles first then mould the sections to avoid spelching or complex backing strips. I used a 250mm groover spaced to 10 and 8mm respectively. 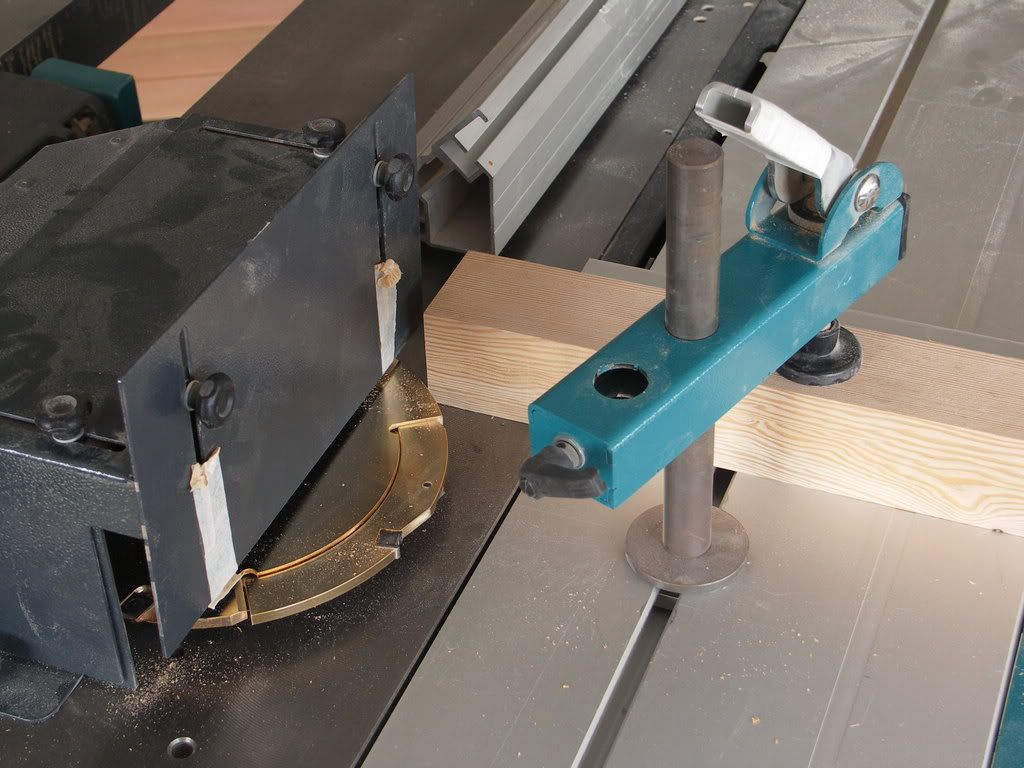 Once you have established a base position it is possible to dial in each step, adjusting packing shims as required.  On the frame the top and bottom rails extend to the sides with the reverse on the sashes. Once the rails are slotted the stiles can be slotted in the centre and tenonned both sides (all different shoulder depths so switch the radio off   ) I use the rip fence as an end stop adjusting the position for each shoulder using the rip scale. For the outer tenonning you need a block with a recessed cap as they are up to 80mm deep. Obviously you could bandsaw all of these, or even hand saw, but we only have one lifetime.  For the scribed shoulder to accomodate the slope of the cill I previously use a tenon saw and saw guide to match the angle but thought I would experiment by first milling a square rebate then tilting a standard 10 deg bevel knife set by 5 further degrees on the spindle to undercut the scribe - it worked and was a lot quicker.  Having cut the joints the rebating was straightforward if involved and I knocked them together dry to see if I had made any errors.  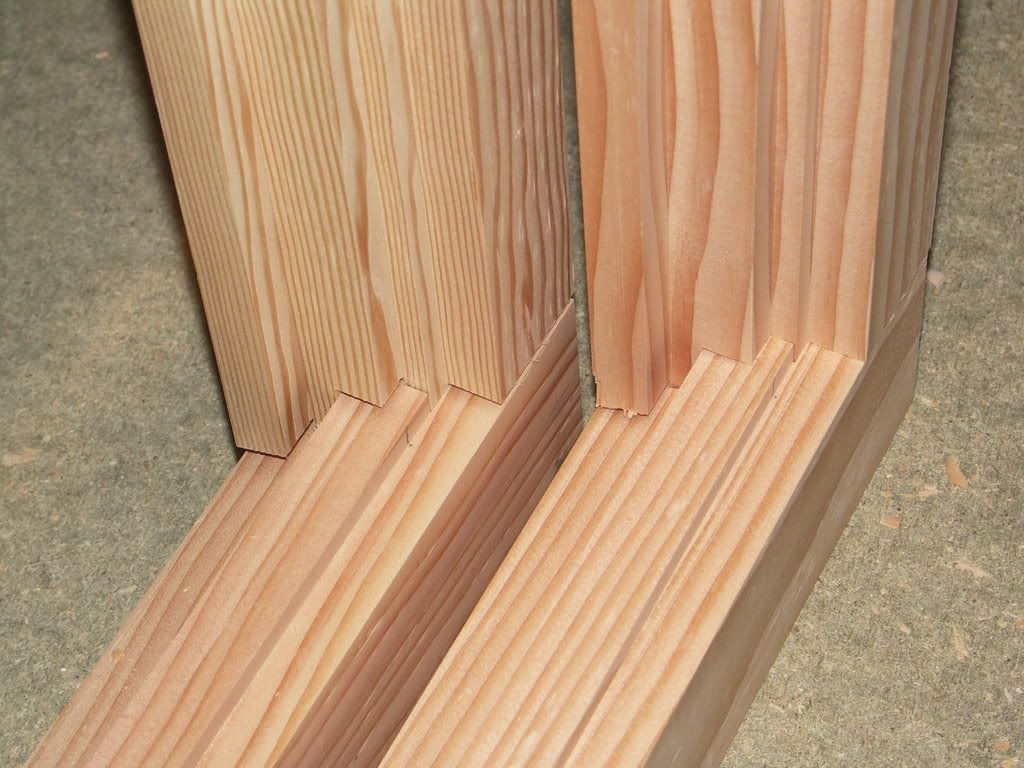 That is as far as I got today and the final pic shows the stopped rebate for the alloy drain tack which is stopped under each stile and under the centre muntin to leave a full shoulder for support. 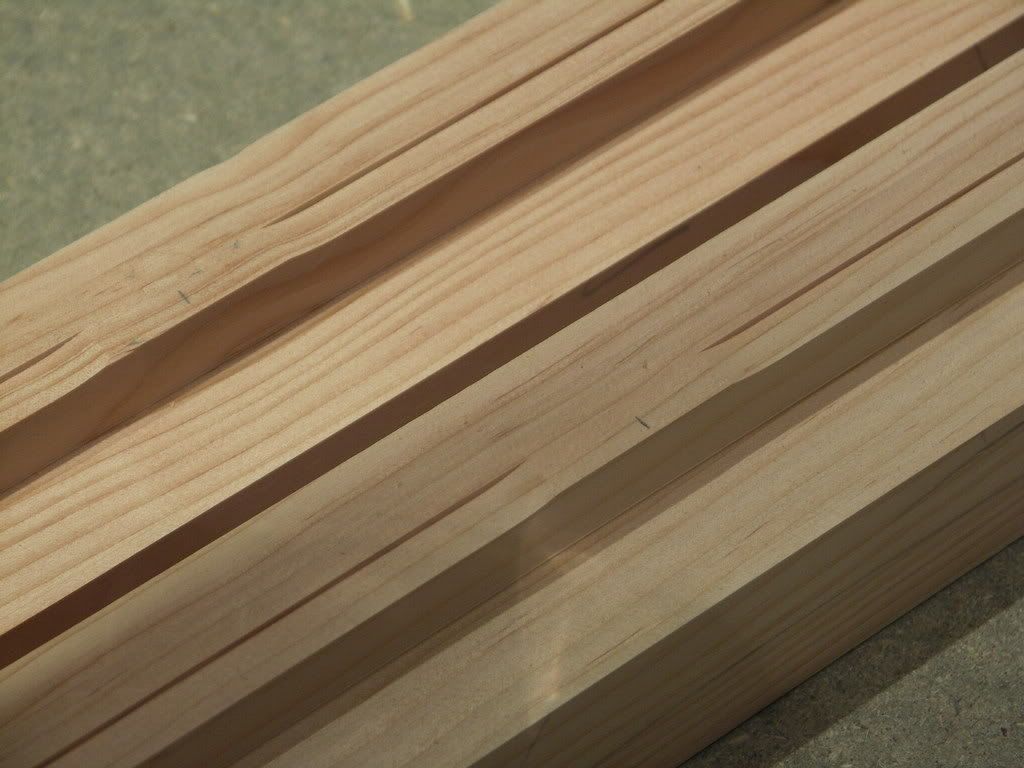 The muntins aren't shown as I cut the scribed shoulder on the wrong end while thinking how to photograph them    I'll see how I get on next weekend Brian |
|
|
|
Post by sainty on Mar 9, 2008 23:00:41 GMT
Nice work Brian, keep it coming.
Rgds
Sainty
|
|
|
|
Post by paulchapman on Mar 10, 2008 9:29:49 GMT
Very interesting, Brian. Thanks for taking the trouble. Cheers  Paul |
|
|
|
Post by jfc on Mar 10, 2008 13:36:43 GMT
Looking good , must be a pain having to set the spindle up for all the differant cuts but like you say the cost of the cutters  |
|
|
|
Post by opener on Mar 10, 2008 21:06:03 GMT
Hi Brian
I've got a large job coming up shortly in Col.Pine/D.Fir but as I haven't used any for a few years I was having trouble picturing it and remembering its characteristics. But seeing your photos brought it all back and I can smell the sugary smell and see the shakes that are always just a bit bigger than the rebate you hope to lose them in. ;D
So thanks for that and some good neat work!
Cheers Malcolm
|
|
|
|
Post by modernist on Mar 10, 2008 21:10:57 GMT
I did beat that shake - just  and the splinters hurt  I find the resin attacks my skin Why do we use it   Brian |
|
|
|
Post by woodworker on Mar 10, 2008 21:58:57 GMT
Nice post Brian. It's been a while since I've seen the Euro style windows.
I couldn't help but notice a fair bit of chip bruising on the 3rd picture. Do you get this often from your planer.
|
|
|
|
Post by modernist on Mar 10, 2008 22:05:25 GMT
You can't hide anything here can you    Yes it is a problem on CP/DF I don't know why as it doesn't happen on other timbers. I think it is related to the extraction power as my single bag extractor isn't able to cope with the 400mm thicknesser width. I was thinking of blanking of most of the extractor hood to concentrate the suck on the action. Any suggestions please??? When I've solved it I'll have a lot les cleaning up. Brian |
|
|
|
Post by woodworker on Mar 10, 2008 22:47:00 GMT
You can't hide anything here can you    Yes it is a problem on CP/DF I don't know why as it doesn't happen on other timbers. I think it is related to the extraction power as my single bag extractor isn't able to cope with the 400mm thicknesser width. I was thinking of blanking of most of the extractor hood to concentrate the suck on the action. Any suggestions please??? When I've solved it I'll have a lot les cleaning up. Brian sorry for noticing  It seems to be a trait with the Hammer p/t's, mine did it & I know a couple of other owners who say the same. I solved mine (sold it  ......, not for that reason really  . I bought an extractor that more than matched the stated extraction rate & it improved things no end. If you've got the time to spare lifting the knives a fraction on the block helps no end according to other owners I've met. Douglas Fir I love that smell.....don't love the splinters ;D. |
|
|
|
Post by modernist on Mar 12, 2008 9:38:42 GMT
Just finishing a "glass wall" using the same basic sections but 100 x 68 for the outer frame and 80 x 68 for the door stiles to keep them as thin as possible. A bit too thin as it turned out as I barely had room for the door gear and ended up getting a 13mm backset ...........think ahead. Just waiting for the metal gear covers and its finished. Believe it or not the whole thing with the triple glazing weighs half a tonne! the door alone is over 100Kg. Door gear is supposed to be good for 160Kg....clever stuff. 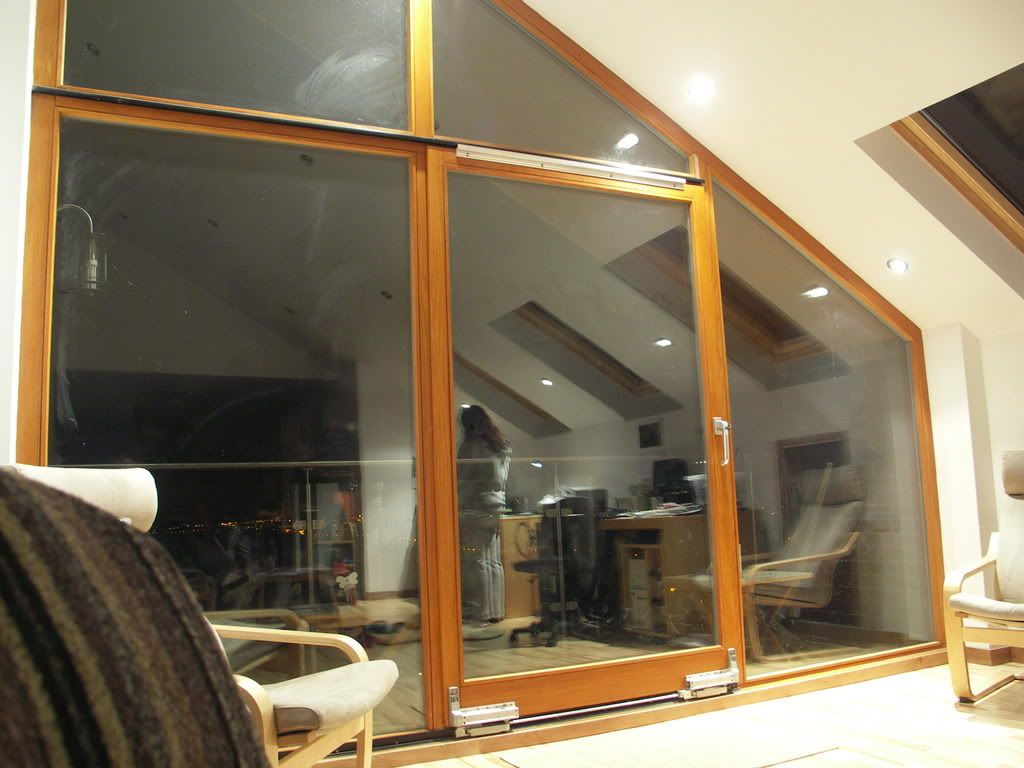 Brian |
|
|
|
Post by pitbull on Mar 12, 2008 17:52:48 GMT
How does the rain drain away from the brick work with there being no cill
|
|
|
|
Post by modernist on Mar 13, 2008 0:27:54 GMT
It does have a cill with a drip raised one brick up from a slabbed balcony then the normal alloy drain track under the door.
|
|
|
|
Post by modernist on Mar 13, 2008 22:10:19 GMT
On second reading I think you are looking at the reflection of the hardwood flooring in the glass. There is actually a 100mm drop to the stone flags.
|
|
|
|
Post by pitbull on Mar 14, 2008 6:36:21 GMT
I was looking at the top picture of the window where it looks like a brickwork opening with a window frame set back into the opening and foamed it. but there seems to be no cill protruding over the brickwork.
|
|
|
|
Post by modernist on Mar 14, 2008 16:46:56 GMT
I'm relying on the drip over the Catnik which is how it was with the old windows
Brian
|
|
|
|
Post by pitbull on Mar 14, 2008 17:16:17 GMT
 I would be concerned about water sitting on top of the enginerd bricks. And soaking into brickwork and timber. Unless I can't see something like a thin flashing, but all I can see is it sitting on foam. What was the failure of the old windows that are coming out. Is the one on image shack your own that you built or the old one. David
|
|
|
|
Post by modernist on Mar 14, 2008 17:25:55 GMT
It's Friday afternoon   The windows will have alloy German style cills at the bottom which are not yet fitted. Phew Cheers Brian |
|
|
|
Post by modernist on Mar 16, 2008 21:52:48 GMT
Well another weekend has come and gone and at least I've replaced the c*cked up centre muntins, cleaned up including planing off the bruising and got the two frames glued up. All basic stuff really but I'm pleased with the finished appearance and looking forward to getting the sashes made over Easter. 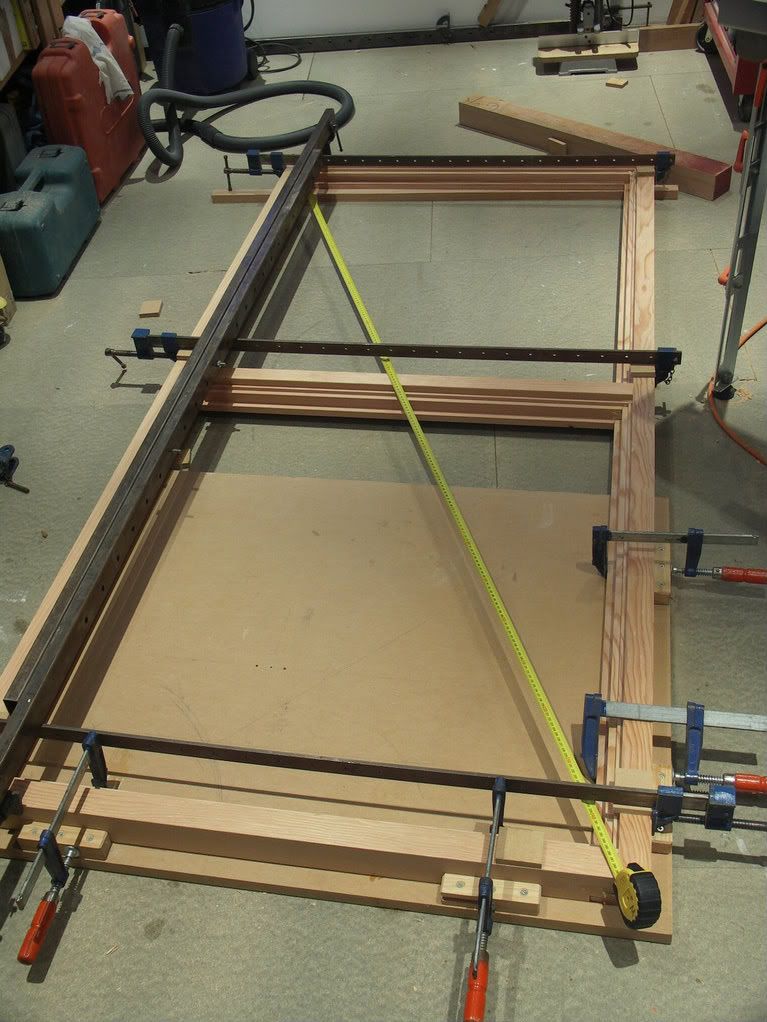 I use a building board with blocks at right angles to speed up truing up the frames or anything square. I just clamp adjacent sides to the blocks and then cramp up the rest. Even on a 2m+ frame the error on the diagonals was less than 2mm straight out of the box. I check them anyway for peace of mind. I used Titebond 2 but noticed it leaves a darker mark than Resin W waterproof so I may go back to that. |
|
|
|
Post by modernist on Mar 25, 2008 23:28:58 GMT
Another week on and not got a lot more done owing to house clearing ahead of the electricians. Its like running ahead of the tide until you ask them when they will be finished. ;D Got the inner sashes jointed and rebated but see my other thread about the gluing problems with Titebond 2. 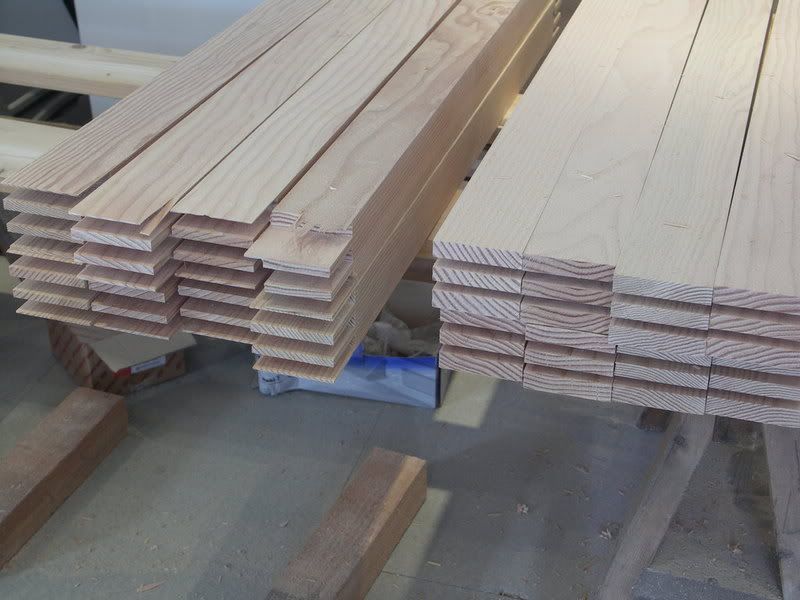 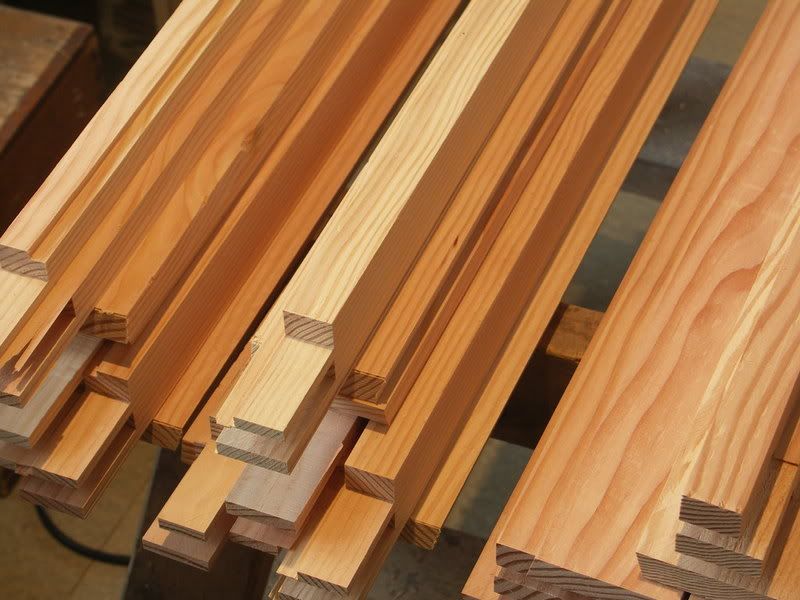 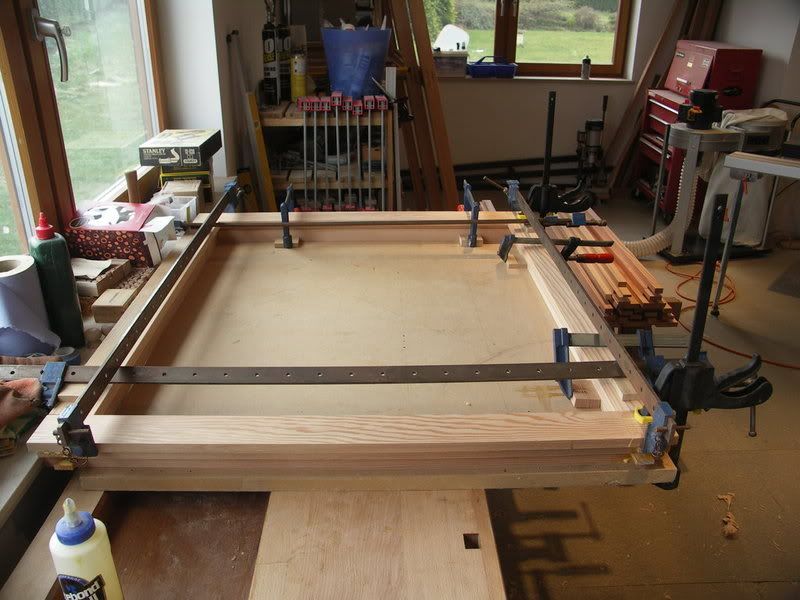 Anyway, I am now ready for my new Eurogroove cutter from Cutting Solutions so I'll let yo know. Brian |
|
|
|
Post by houtslager on Mar 26, 2008 11:49:47 GMT
where or should I ask whom did you get the ironmongery from for the tilt and turn windows.?
|
|
|
|
Post by modernist on Mar 26, 2008 16:45:27 GMT
That took me several weeks to sort out. In the end I bought Roto from Wagner who also do Seigina which I used for the tilt and slide doors.
There is a problem as no-one knows anything about timber sytems as they are all tuned to plastic and metal. I ended up with a mixture of genuine timber items and a top stay from the PVC range. The latter required a 20mm rebate rather than 18mm for the rest so out came the router.
Roto have a new system out recently which looks good but I have yet to use any. Hopefully it will address the stay issue above but I cannot confirm that.
Works out about £40 per window inc handle.
If you need part numbers etc just PM me
Brian
|
|
|
|
Post by lynx on Mar 26, 2008 21:10:51 GMT
Roto have the new NT system. Just ordered a set to suit a 800x800mm development window, with delivery/VAT came to £55.
|
|
|
|
Post by modernist on Apr 4, 2008 20:47:54 GMT
I'm working away for 3 weeks now so there will be a bit of a pause in production.
Ive ordered another 1.5 m3 of columbian for the next batch so I've got a lot to look forward to when I get back.
cheers
Brian
|
|
|
|
Post by modernist on May 5, 2008 22:11:14 GMT
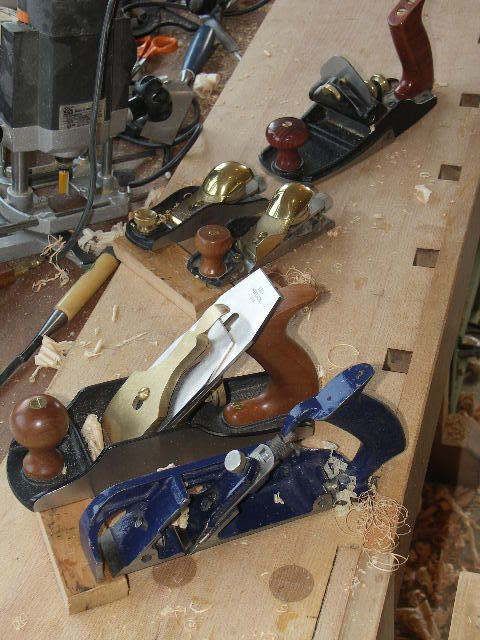
Hi all , back from working away and another grands worth of Columbian settling in the garage. (No I'm not giving my address) ;D Having had the opportunity to think more about the methods of making these windows I decided to alter my method for the next batch. As I said earlier these are designed to be "machine made" but whilst it is tempting to buy the stacking tooling this costs an arm and a leg and has limited other uses. On the other hand if you slavishly follow that procedure but using adjustable slotters and rebate heads it turns into a long job of constant machine setting. Consequently I decided to make more use of the saw where I could to speed up some of the unseen rebating such as the glazing sections and the scribed tenons which were particularly cumbersome without a dedicated cutter. At the other end of the scale I did treat myself to a purpose made Eurogroove cutter (from Cutting Solutions) which I am looking forward to using later. Starting from the beginning I prepared yet another heap of 80 x 68  Now came the first change. I ripped the inner sides of the glazing rebate (with the loose glazing bead stiff attached) along with the drain groove. I wondered if this should be wider than the 3mm kerf? 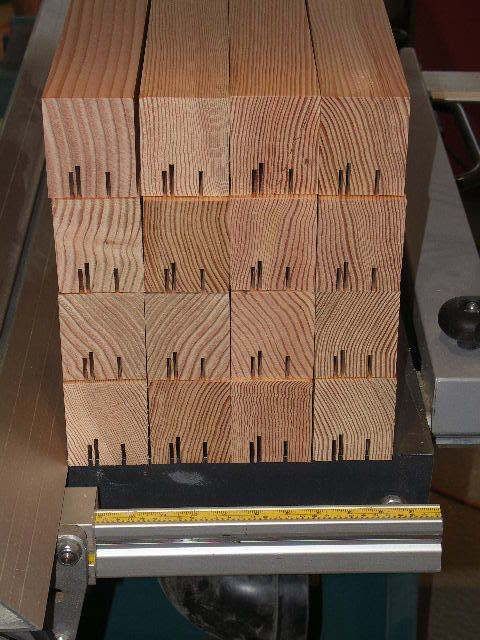 Tying in to some earlier threads I mark the first piece, set the machine, and then rely on the machine stops thereafter. I check every 10 or so that the measurements are still OK. 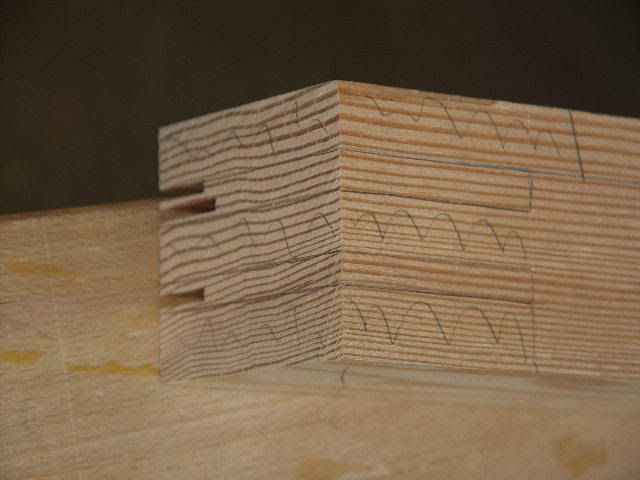 Now for the second shortcut. I scribed the last tenon shoulders on the moulder with a chamfer knife tilted to suit but this was very laborious. This time I cut the scribe first on the bandsaw with a rolling work support as these pieces are too heavy to hold accurately.  I used the cheap and cheerful Hammer mitre fence to repeat the length but there is some spring in the guage rod which lead to some inaccuracy later so I will need to modify this for the future  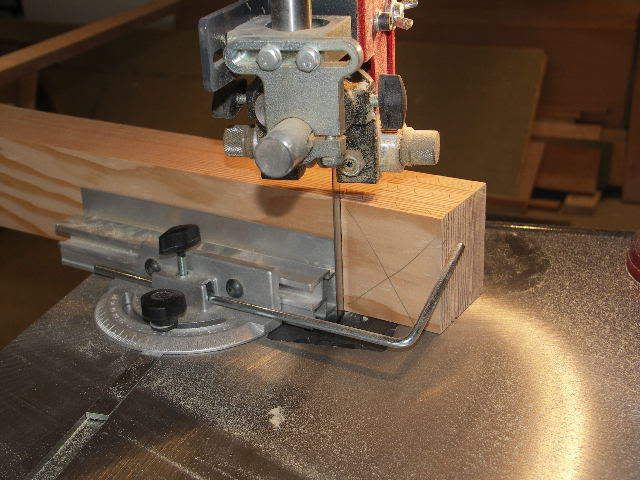 I then set up the slotter in the normal way, doing a test cut to check the actual slot width and height, in a piece of waste. The way I do this is to cut the slot at any convenient height then measure "A" accurately with the vernier and adjust the moulder height on the dial guage accordingly. This should get you within 0.1 mm if you always work from the face side. 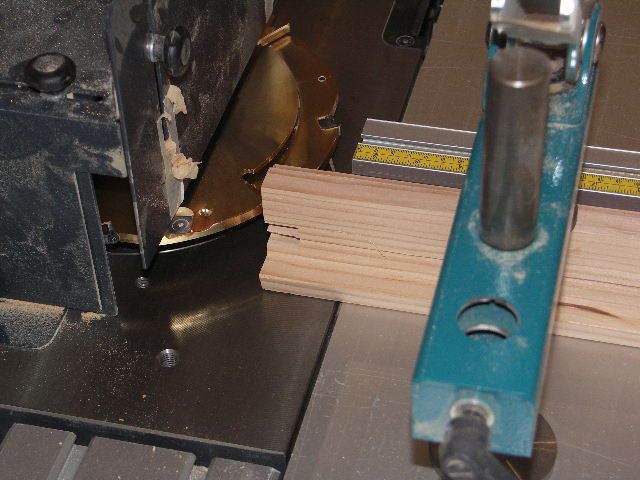 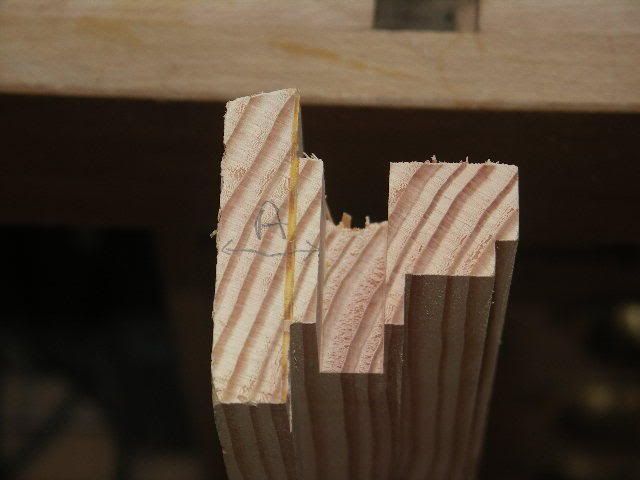 I set the first cut to be the waste of the scribed tenon which is longer than the other two but just used the same depth setting as the scribed part will be removed on the bandsaw later. There is no need to bother with a backing strip on this cut as the already cut shoulder will prevent any breakout.  Next came the stiles which are easier as all the tenons are the same depth. the width is altered as necessary 10mm at the front and 8mm behind but if you start at the bottom, near the machine table, and mount the slotter near the top of the spindle you can use the lower knife as a reference and just wind up the appropriate amount each step, allowing for additional spacer shims as you go. 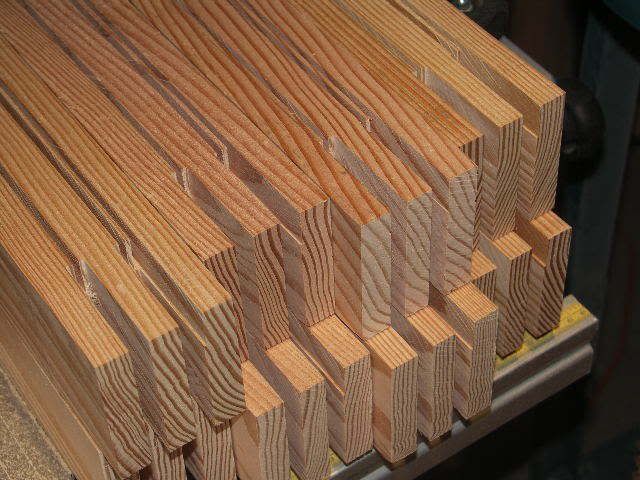 Back to the rails next where the scribed shoulders were cleaned out on the bandsaw. 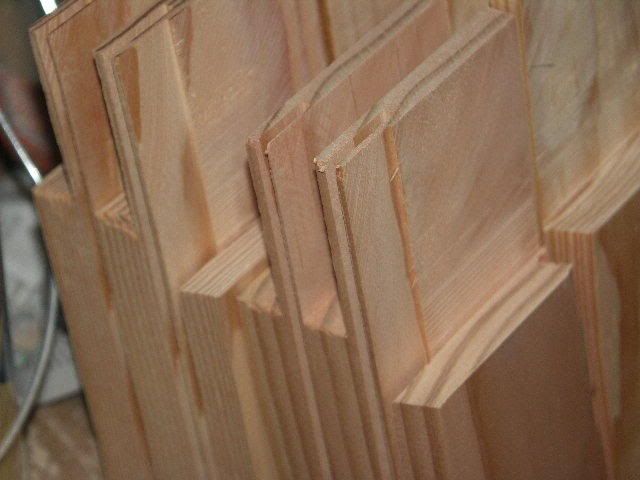 That's it for the crosscutting - now for the long rebates. I use a standard rebate block and have not found a false fence any benefit for this application. I do leave a wider gap at the trailing fence in the hope of catching more shavings into the extraction box 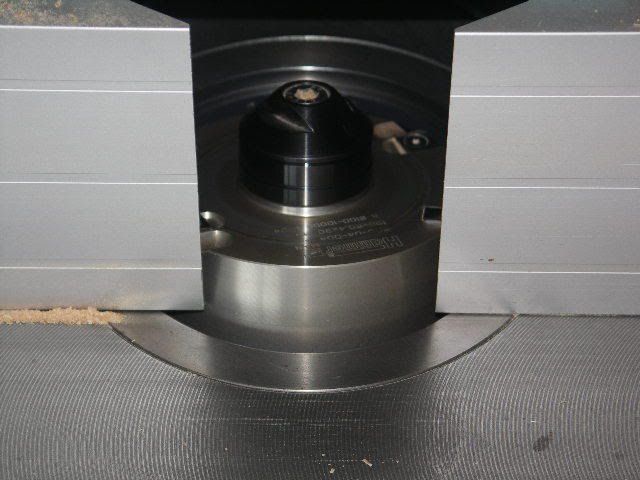 I started by cutting the slopes on the glazing beads, the outer 3mm lower than the inner to allow for subsequent parting on the saw.  I left the inner bead on to help stabilize the piece while moulding the 3 outer rebates  Another change to last time was to cut the rebate in the lower edge of the inner glazing bead on the saw before parting off the bead and clearing the glazing rebate in a single saw cut.  This is a happy time as you get a "free" glazing bead and some usable square section for stock!  The sections were then cleaned up with a selection of planes which, in order to give Jacob something to shoot at were ;D, - LN 4 1/2 smoother
- Record 778 rebate
- LN LH 140 for tenons and cross grain chamfering of edges and inside some rebates
- LN 60 1/2 for general chamfering of edges
- Veritas Scraper place for the difficult grain
 Having done a dry run to check fit and adjust as necessary with the above armoury it was back to the square gluing jig and a handful of cramps.  Just for info I include a pic of a bit of scrap showing really bad glue stains from Titebond 2, now in the bin, and have moved back to Resin W outdoor of whatever it is now called, blue bottle. 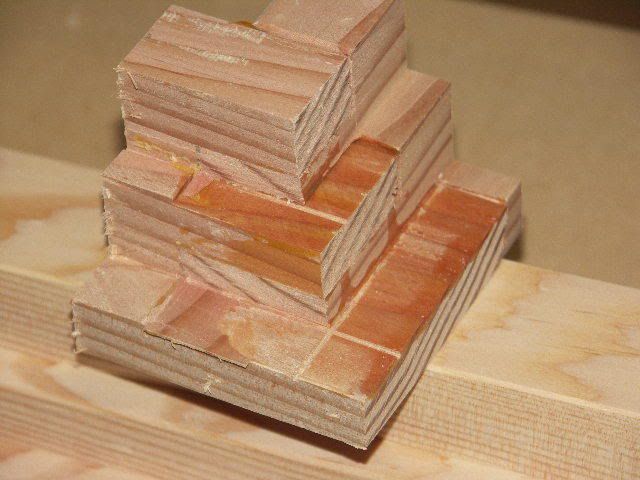 Next week I'll let you know if they come out true. Brian |
|


 ) I use the rip fence as an end stop adjusting the position for each shoulder using the rip scale.


 ) I use the rip fence as an end stop adjusting the position for each shoulder using the rip scale.


 ......, not for that reason really


